What is WordOps
WordOps provides fast and secure WordPress deployment with NGINX with simple and easy to remember commands. Added with EasyEngine v3, it was much more than an updated version of EEv3 with a number of new features, including Wildcard SSL certificates with DNS API authentication support, Linux kernel optimizations, or a custom NGINX package with TLS v1.3 and Cloudflare HTTP/ 2 HPACK support.
How to install WordOps
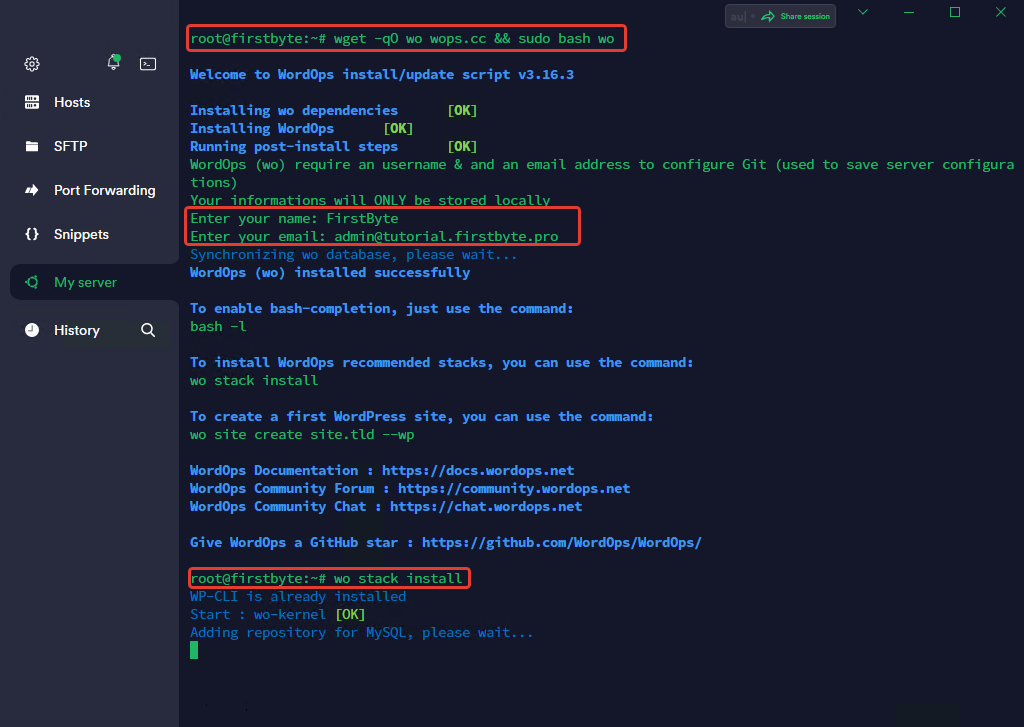
First, we connect to the server via SSH and execute the command to download the installation script and wait for the “wops” itself to be installed and when the required fields become available, we will indicate some data, such as name and mail.
wget -qO wo wops.cc && sudo bash wo
And after that, we execute the command and install a stack of packages that are necessary to install WordPress sites and wait.
After a successful installation, we will receive login details for the WordOps control panel.
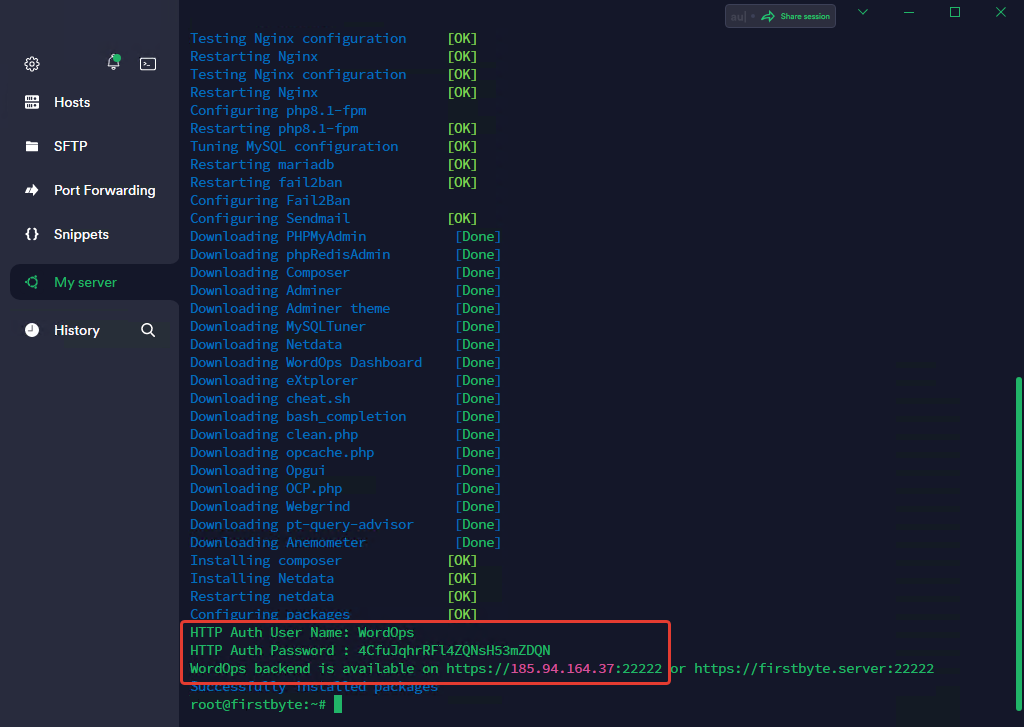
But first, we will create a WordPress site using the terminal, as it is impossible to do in the WordOps panel.
First we have to register a domain if we don’t already have one. If we have one, we need to specify A record the IP of our server – in the free DNS hosting panel from FirstByte.
To create a site with an SSL certificate and caching from NGINX, run the command:
wo site create example.com --wpfc --php81 -le
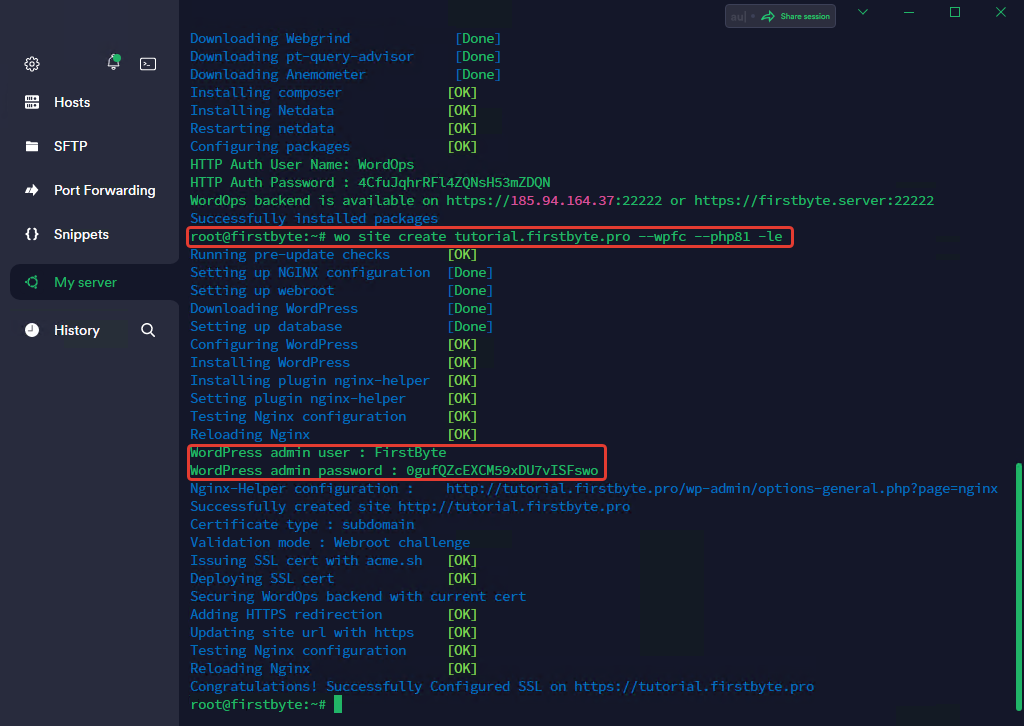
As you can see, after installation, we received login details for the admin section of the site.
We go to the site and check if everything is fine, is the admin section is working and if SSL is installed correctly.
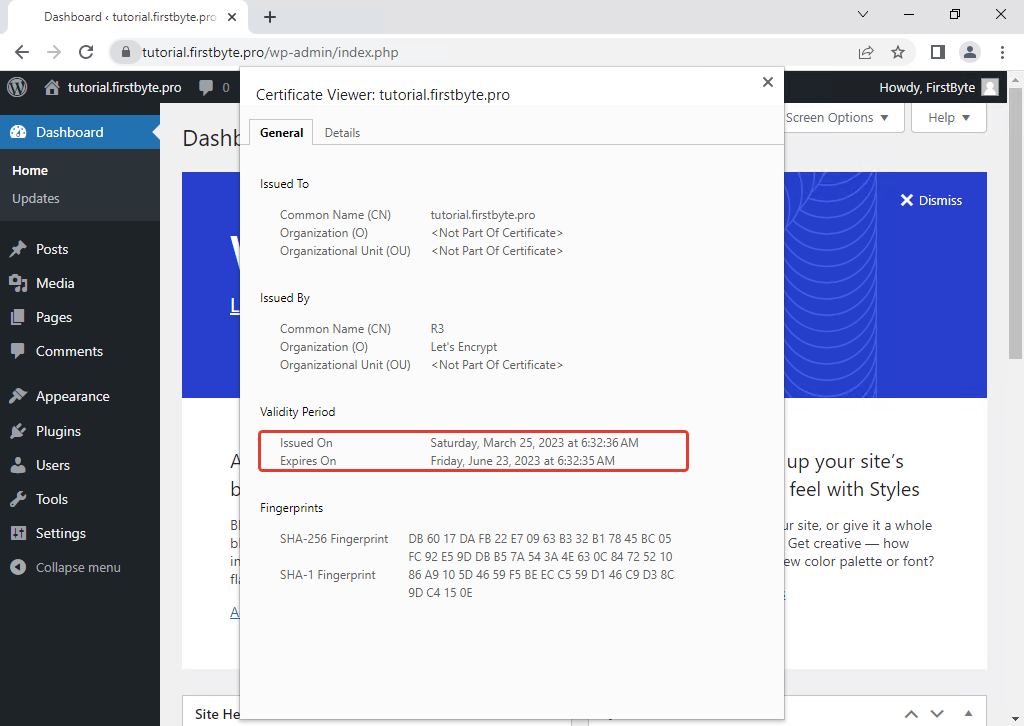
As we can see, everything is fine with the site, WordPress installed correctly, the admin section works well and most importantly, SSL also works!
Now we can see the admin section of the WordOps panel, which even has good monitoring from NetData.
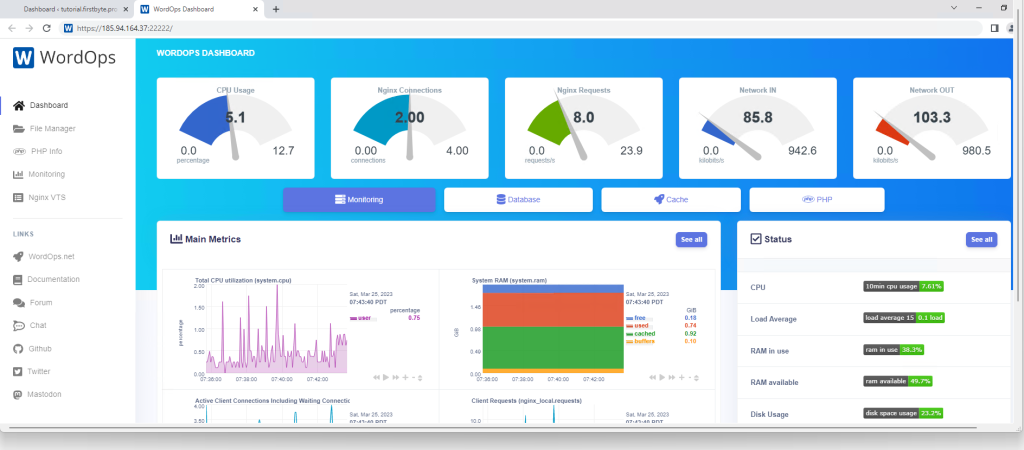
In addition to view just monitoring, here you can use the file manager and upload files, reset the cache (but this is also possible through the site itself) and much more.


