

What is TinyCP
TinyCP is a lightweight control panel and is a good alternative tool for cPanel for Linux servers to manage various services in Linux. You can easily create domains, databases, email, and FTP accounts. The user interface is simple and easy to use. This may be the best option for you if you are limited in resources and need a control panel to design and administer your system. Ubuntu and Debian users are the only ones who can currently use TinyCP.
Preparing the server for TinyCP installation
You need to install the dependencies by running the following command
apt install apt-transport-https dirmngr gnupg ca-certificates -y
Now we add the repository for further installation using the command
apt-key adv --fetch-keys http://repos.tinycp.com/ubuntu/conf/gpg.key
echo "deb http://repos.tinycp.com/ubuntu all main" | sudo tee /etc/apt/sources.list.d/tinycp.list
Now update the system and install TinyCP by running the following command
apt-get update -y
apt-get install tinycp -y
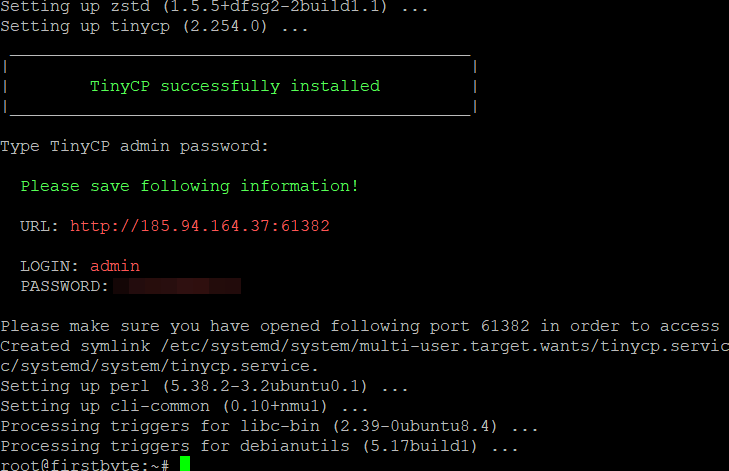
Before the installation is complete, specify the password for the admin user, press Enter and receive the login data. If necessary later, the password can be changed at any time.
Follow the link to the panel
http://IP-address:61382
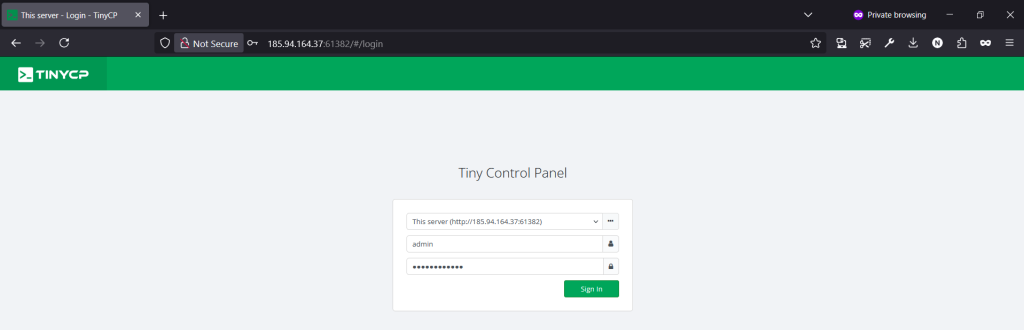
We indicate the login data, i.e. login admin and the password we specified, then click on the Sing in button
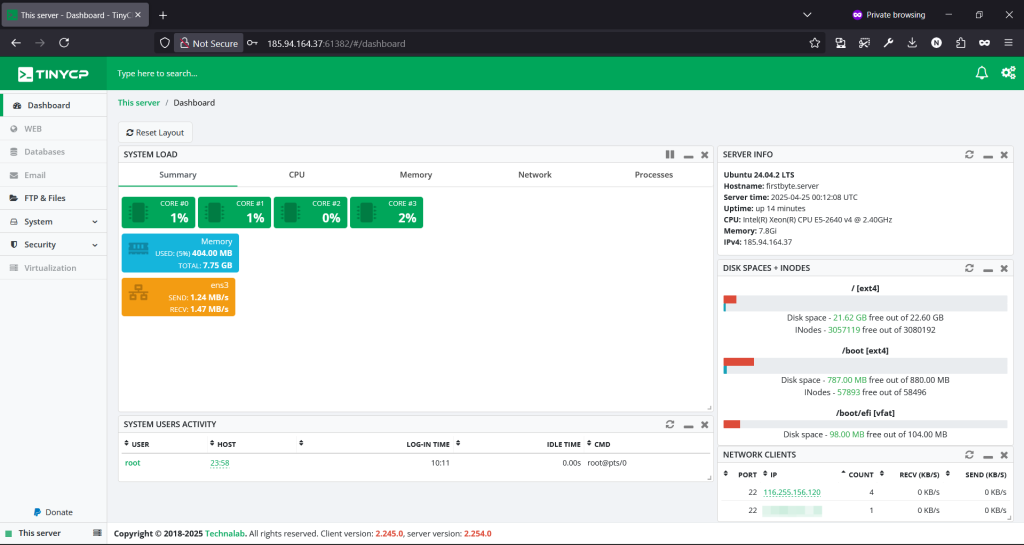
After entering the control panel, we will see the following, all information about the server, the current load and other features that the panel has
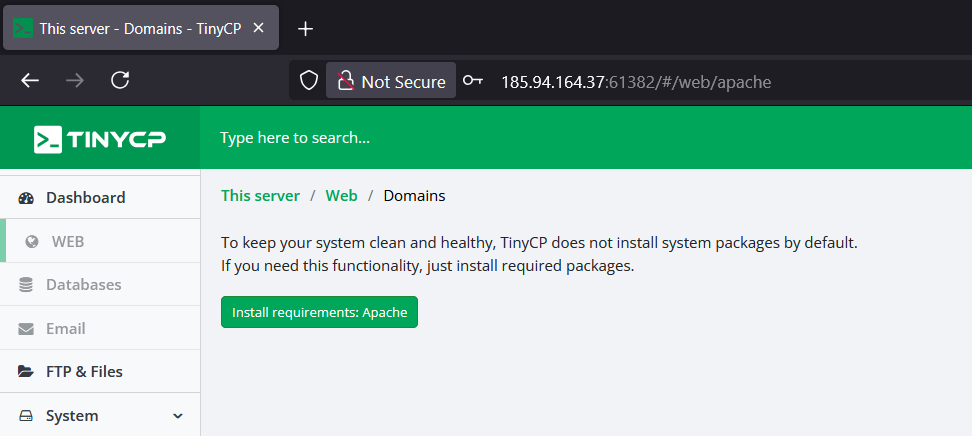
To use the web, mail and database server we must first install them. Click on any of them and click the button to install the service/server, an example is shown below
Then we choose what exactly you want to install
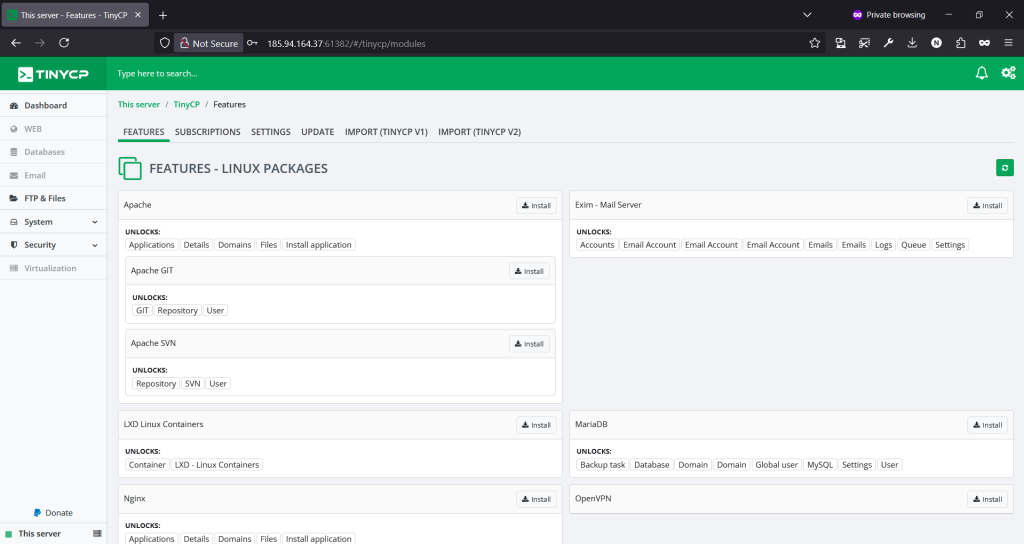
For example, we want to install Apache, to install we click on the Install button and wait
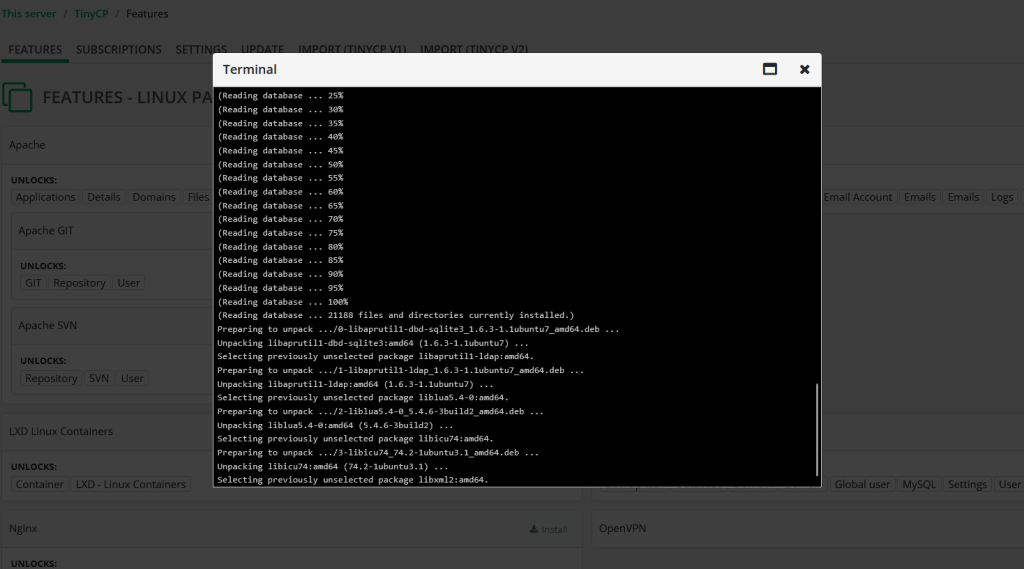
Above you can see what the process of installing services on the server looks like, and so it will be with the rest, you will see the terminal and the process itself, which you can follow. Immediately after installing the required service, the terminal will close.
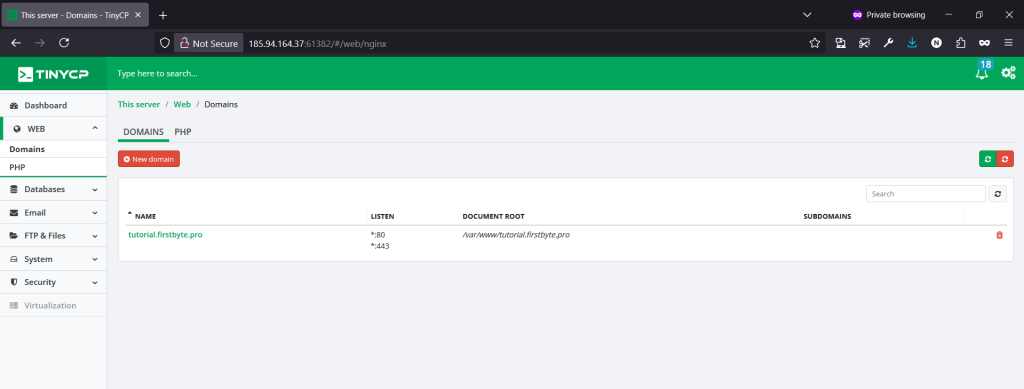
Now after all the services for the site are installed, we can add it. We have already added it and you can see how it looks on the screenshot.
You can also create a database, user and install WordPress for website, RoundCube for mail and phpMyAdmin, and you can also issue a free SSL certificate.
Thank you for reading our guide to the end, now you know how you can very easily install TinyCP, which really works well, and through it you can monitor resources and do a lot more!