

Nextcloud is an self hosted cloud, similiar to Google Drive, Dropbox, OneDrive and other public cloud services that you can install on your own server and make your own private cloud for storing files. This software is suitable for small and medium organizations that do not want to depend on other storage systems. The application allows you to install various applications, read news, mail, organize your photos, watch videos and much more, as well as hold online conferences and communicate with other users.
How to install NextCloud after installing CloudPanel
To install “NextCloud”, we need to install the “CloudPanel” control panel will help us as it is one of the “lightest” panels that has very good caching. To install NextCloud, any hosting is suitable, preferably powerful on VDS or a dedicated server. You can create a hosting account on any control panel. Here we will show how to do this using the CloudPanel control panel as an example.
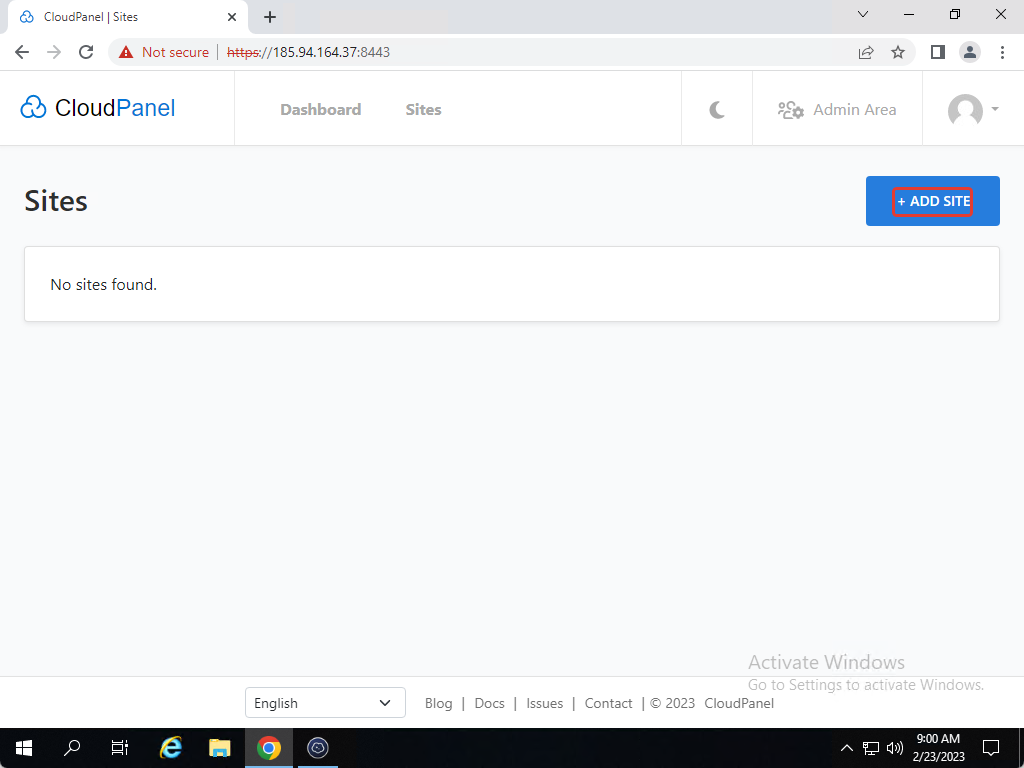
We go to the panel that we have already installed and add a new PHP site. At the top of the page, click on “ADD SITE”
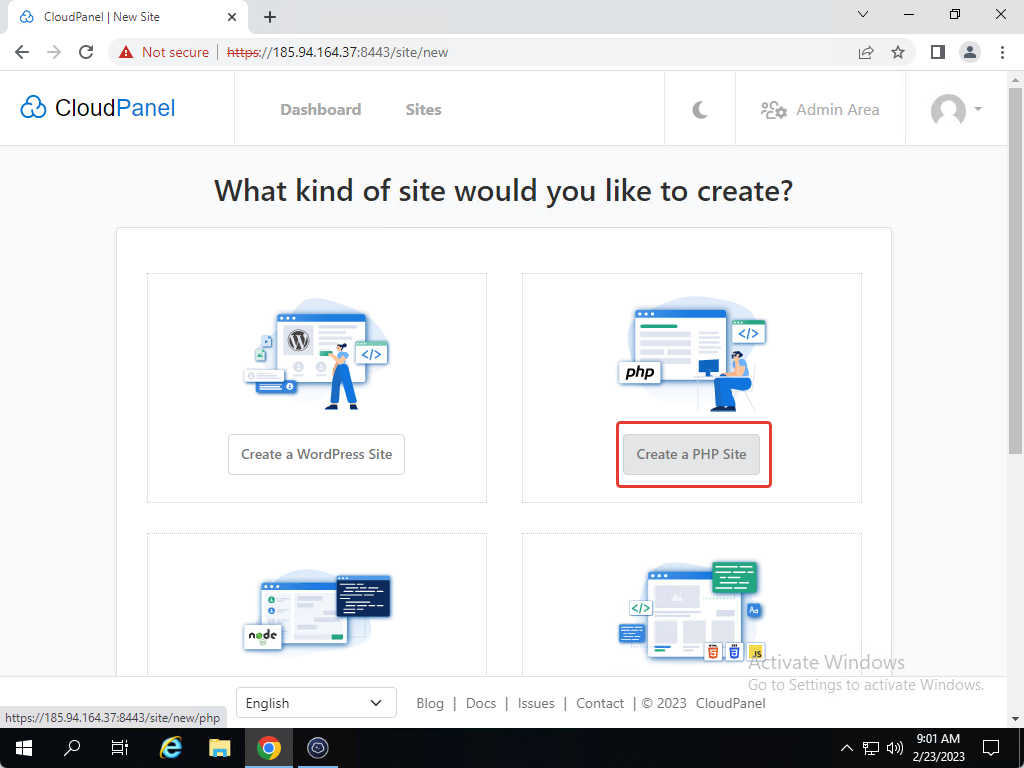
In the new page, click on “Create a PHP Site”
Then we specify the data for our site, in application we chose NextCloud then we specify domain, username and password, PHP version and click on “Create”.
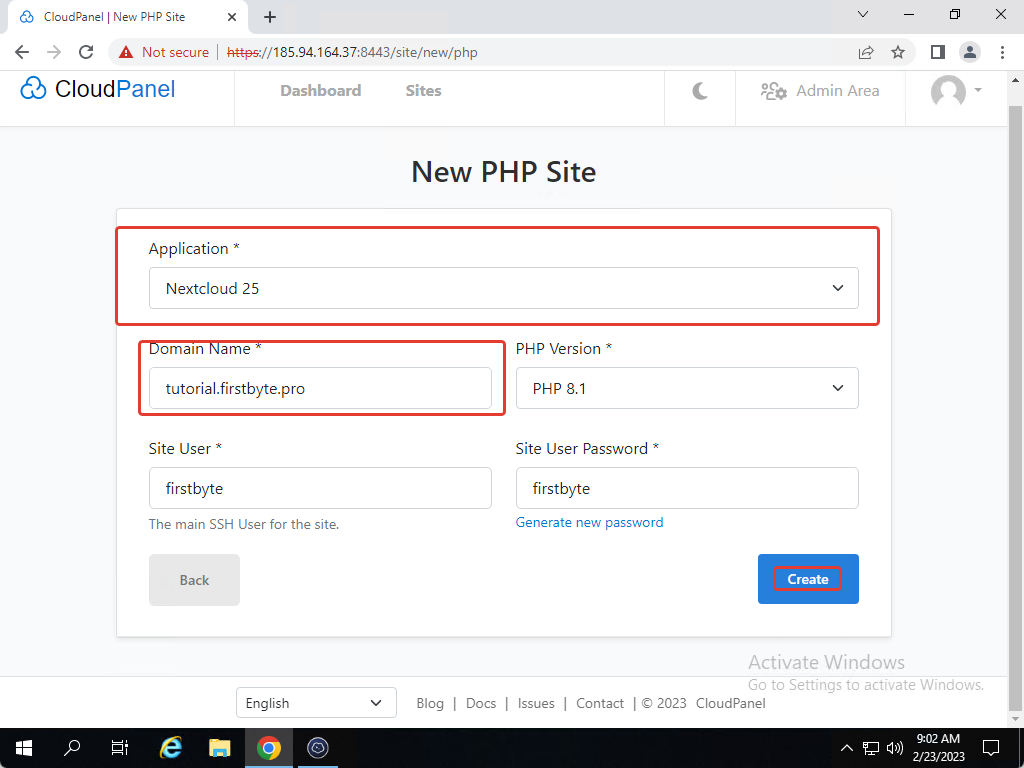
Once created, the site is ready to install “NextCloud” – yes, this is not a autoinstaller and NextCloud it is not installed automatically.
How to install Let’s Encrypt
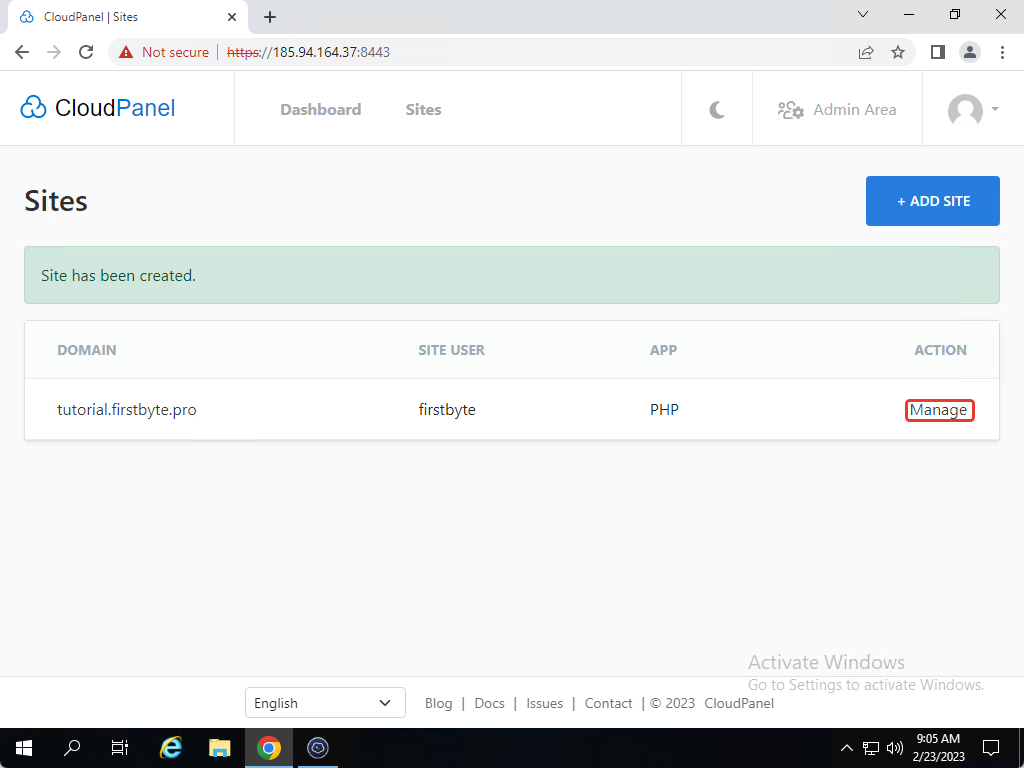
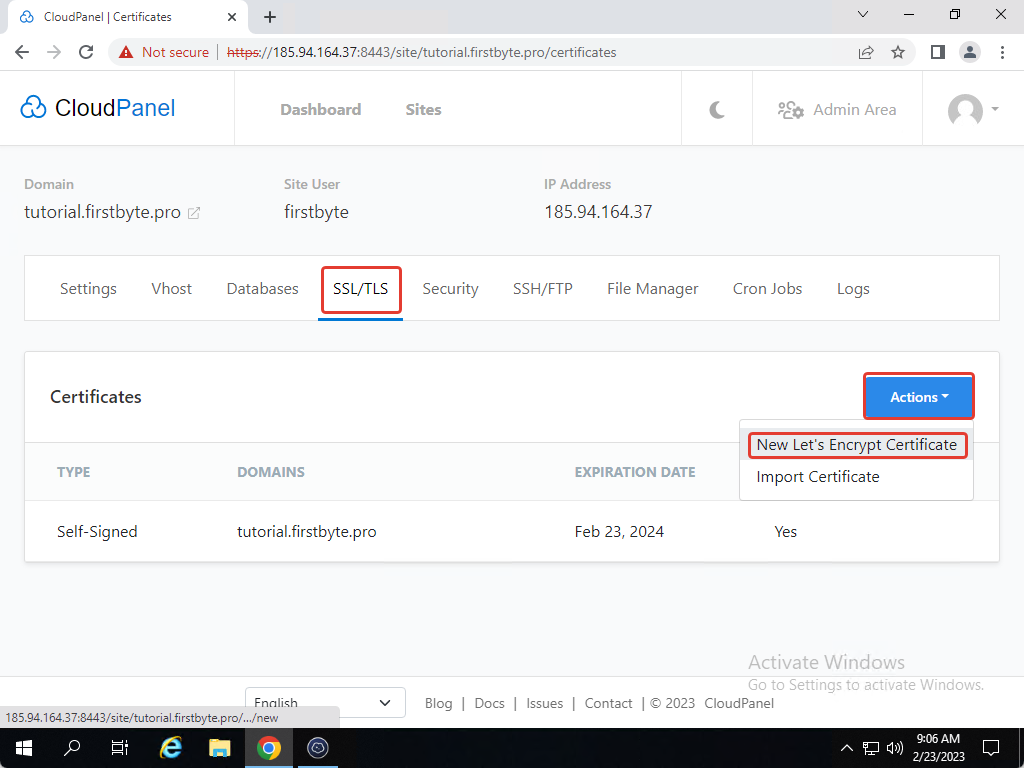
In the initial page, click on “Manage”, go to “SSL / TLS” and install a free certificate from “Let’s Encrypt”.
Then click on “Actions” -> “New Let’s Encrypt Certificate”
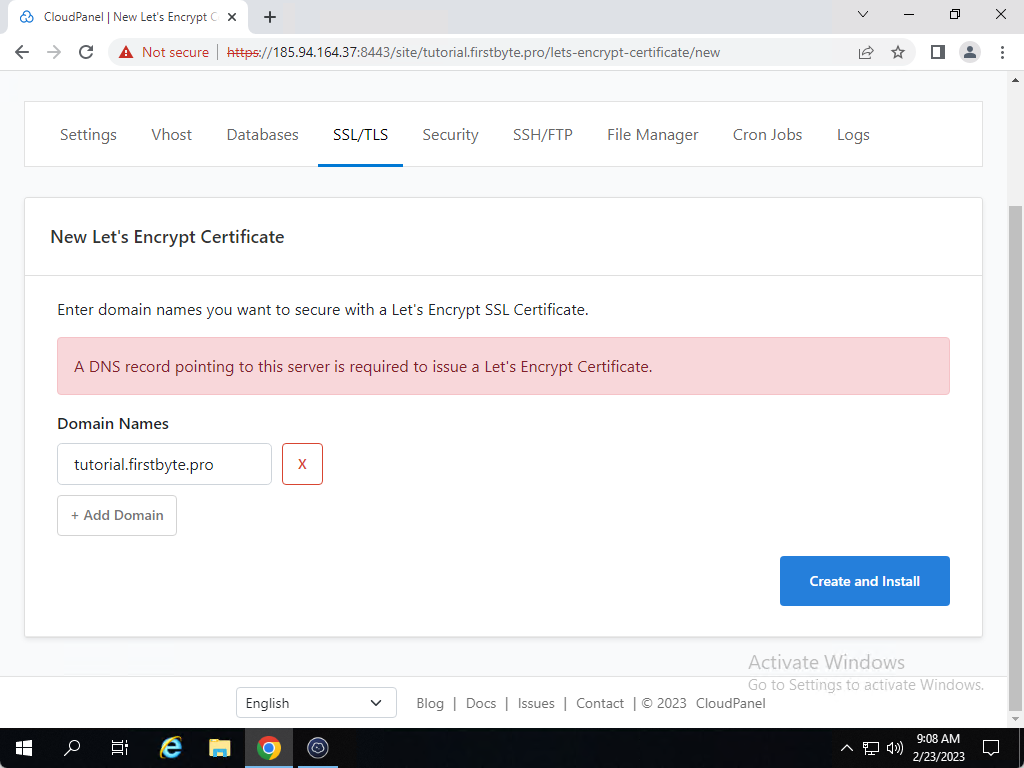
Click on “Create and Install”.
Important! You must have a working domain/subdomain for this action.
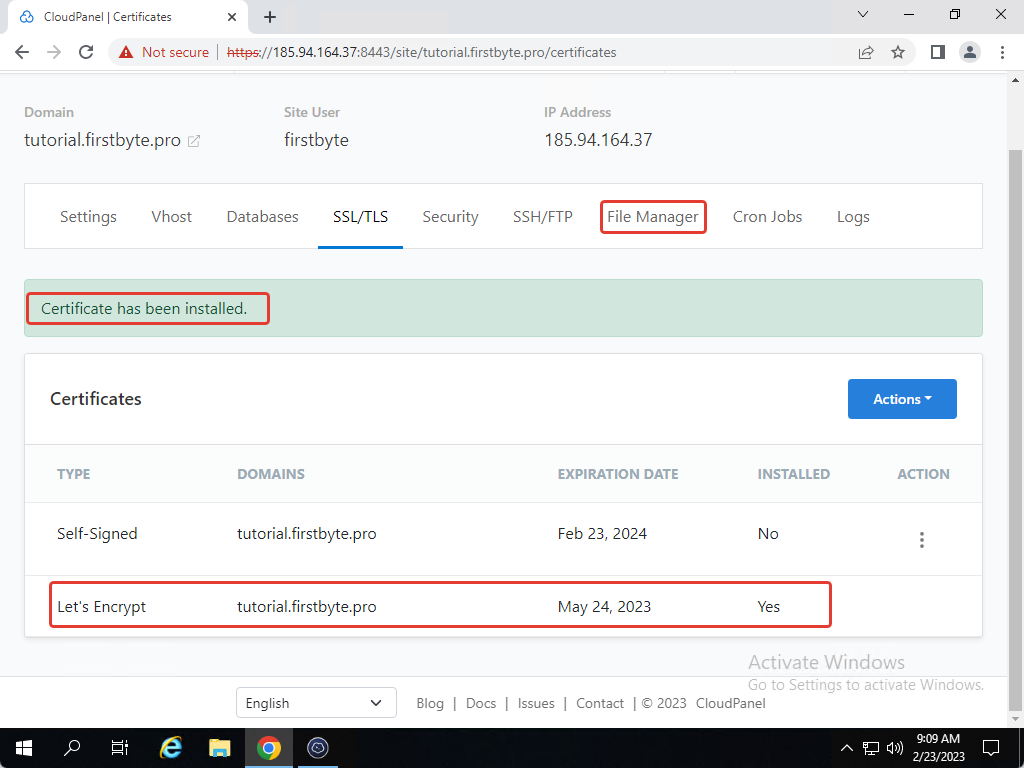
We see that the certificate has been installed and then we go to “File Manager”
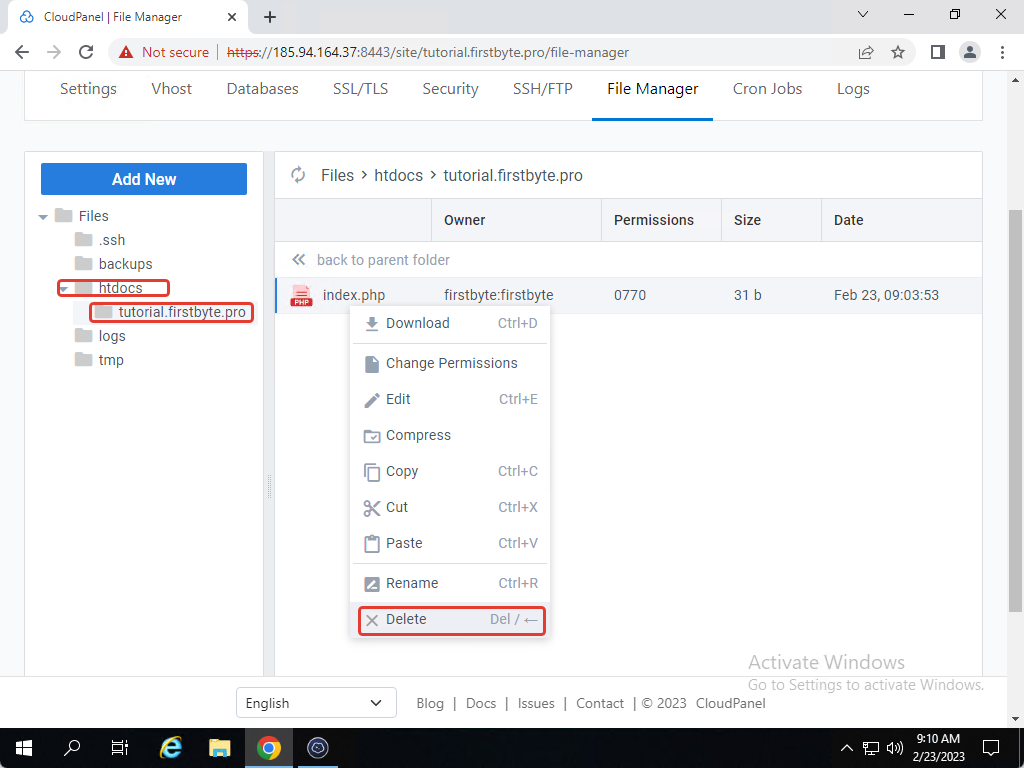
We go to the folder where our domain is located (htdocs -> name.domain) and delete the “index.php” file.
How to download NextCloud
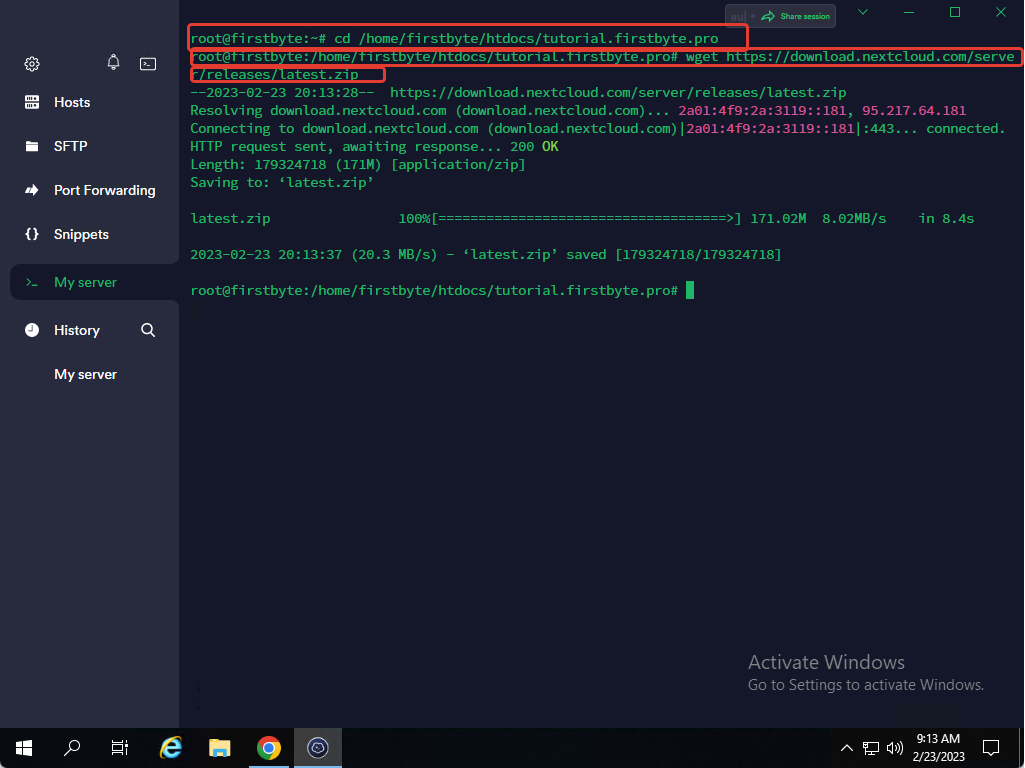
We need to login to our server via SSH and go to the folder where our domain is located and download the latest version of “NextCloud”.
cd /home/firstbyte/htdocs/tutorial.firstbyte.pro
#(replace with your domain and user)
wget https://download.nextcloud.com/server/releases/latest.zip
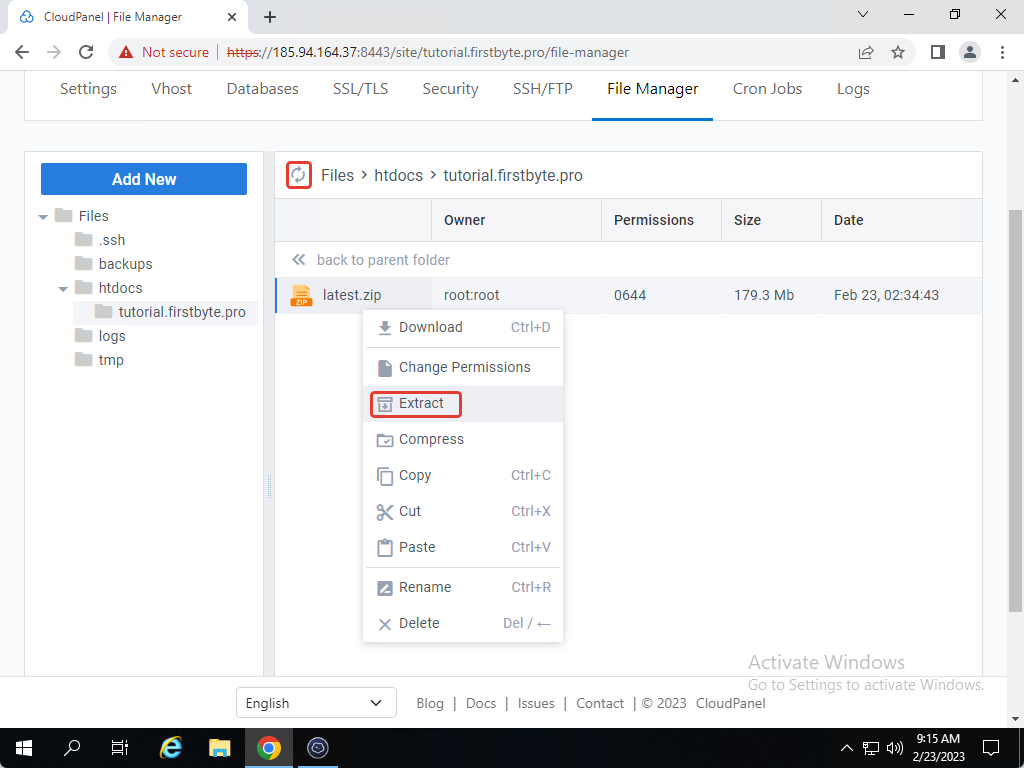
Then we go back to the panel, refresh the page in the file manager and extract our files from the archive and then we delete the archive.
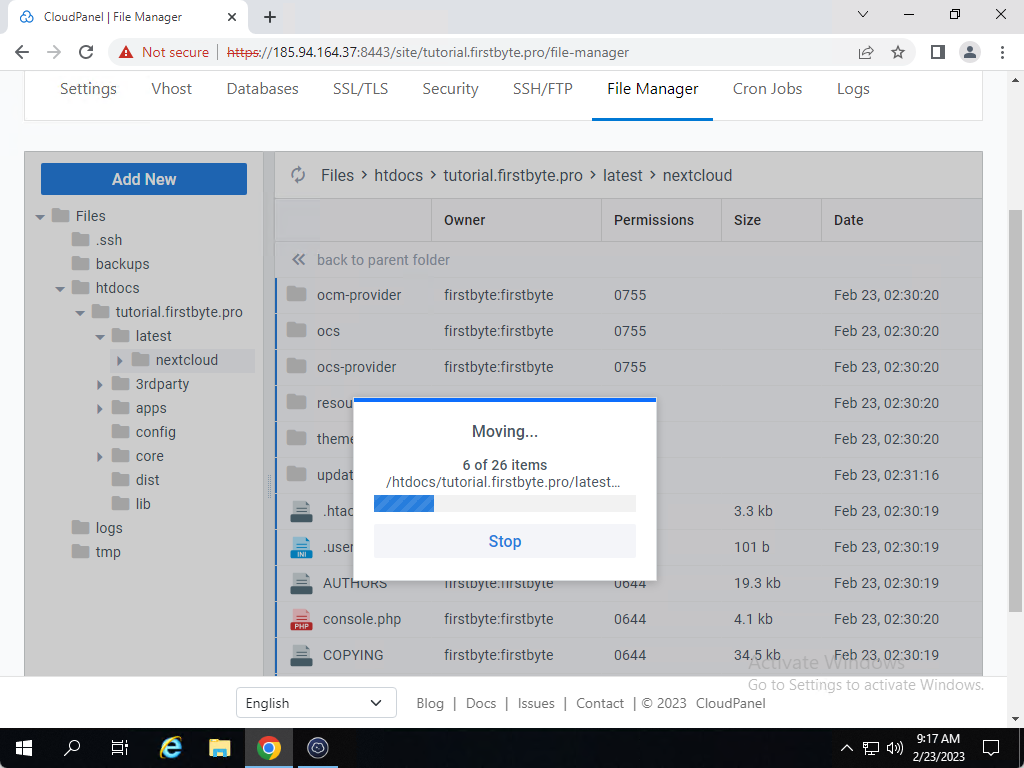
Now we go to the “latest” folder, then to the “nextcloud” folder and copy all the contents to the “your.domain” folder (in our case, this is tutorial.firstbyte.pro).
Select all files with “CTRL+A” and move them to the domain folder.
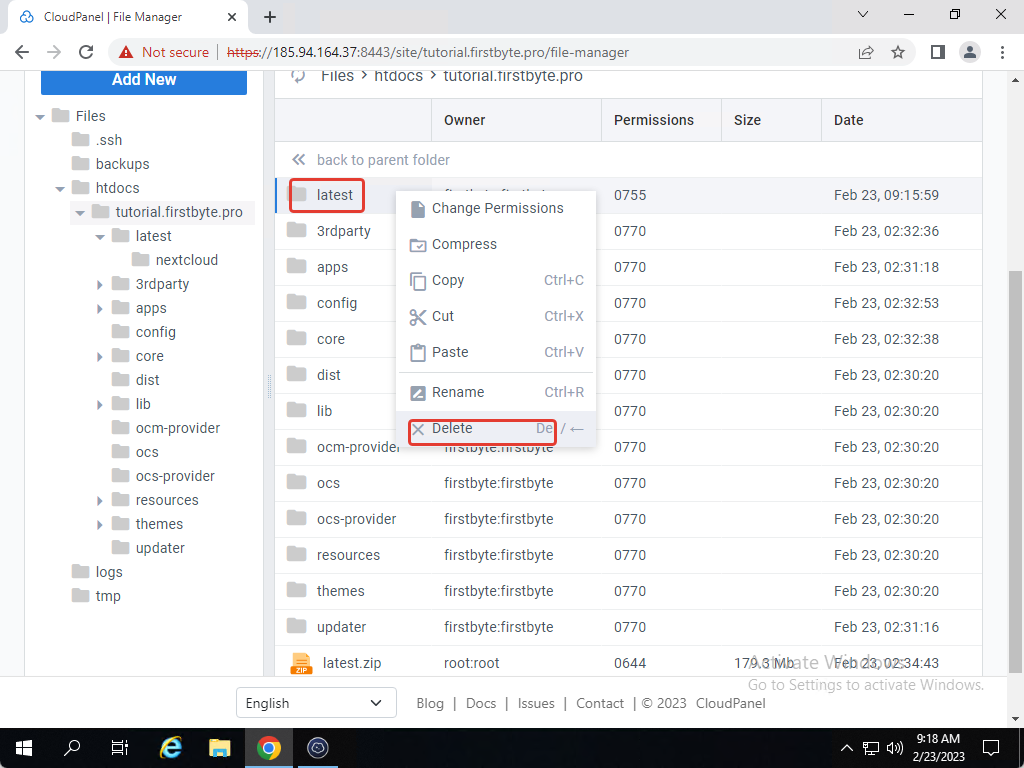
Then we delete the extra folders “latest” and “nextcloud”.
How to make the rights on files and folders to be correct
As you can see, our folders have 770 permissions, but it should be 775.
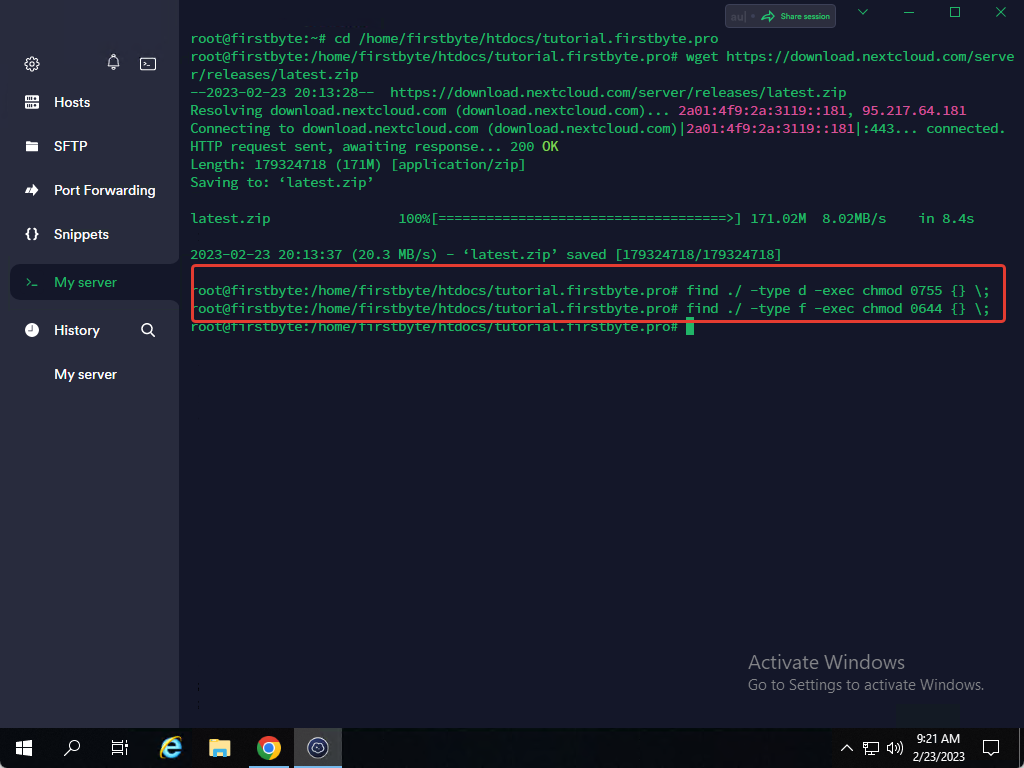
We go back to the server to the folder where the files are located, and execute the command
#go to file folder
cd /home/firstbyte/htdocs/tutorial.firstbyte.pro
#execute the command and elevate the rights of all folders in the folder tutorial.firstbyte.pro
find ./ -type d -exec chmod 0755 {} \;
#for file permissions execute
find ./ -type f -exec chmod 0644 {} \;
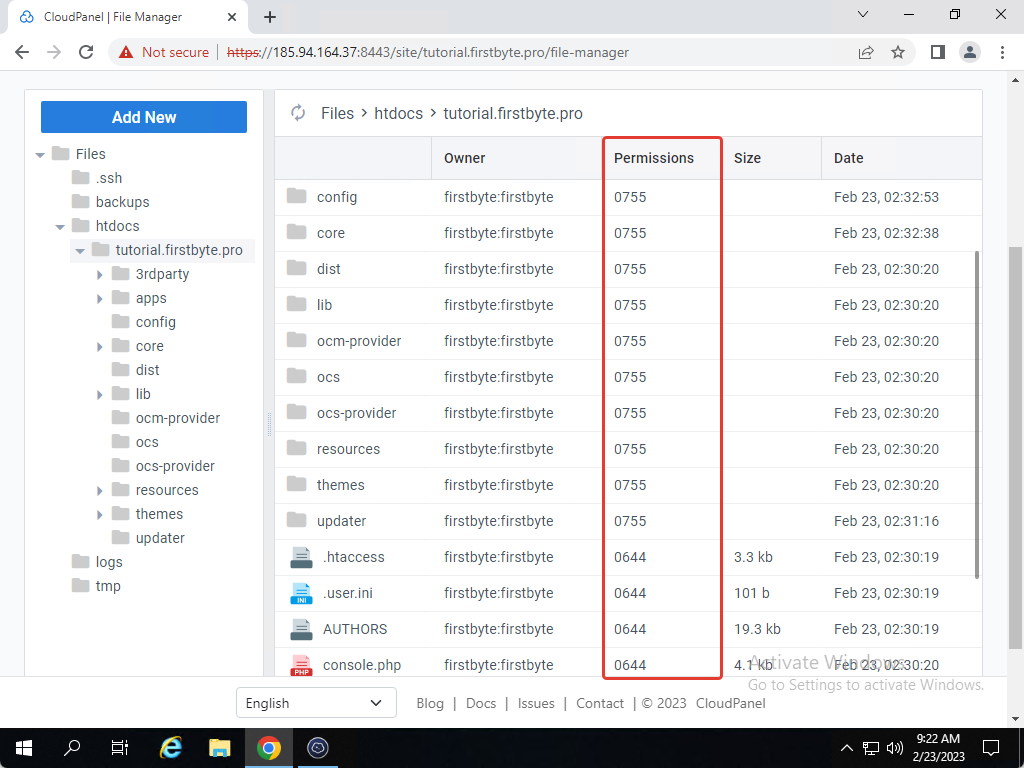
We return to the panel and see that the rights are now 755 for all folders.
And the files have permission 644 – as it should be.
How to create a database
Click on the “Databases” button, and then on “Add Database”

We indicate the name of the database, the database user and its password and click on “Add a database” – Then we save all the data in a notepad, as we need them right away.

Installing NextCloud on a domain
We go to our site, specify the login and password for the administrator, then click on the button “Storage and database” -> “MySQL / MariaDB”, fill in the data of the database that we created and click on “Install”.
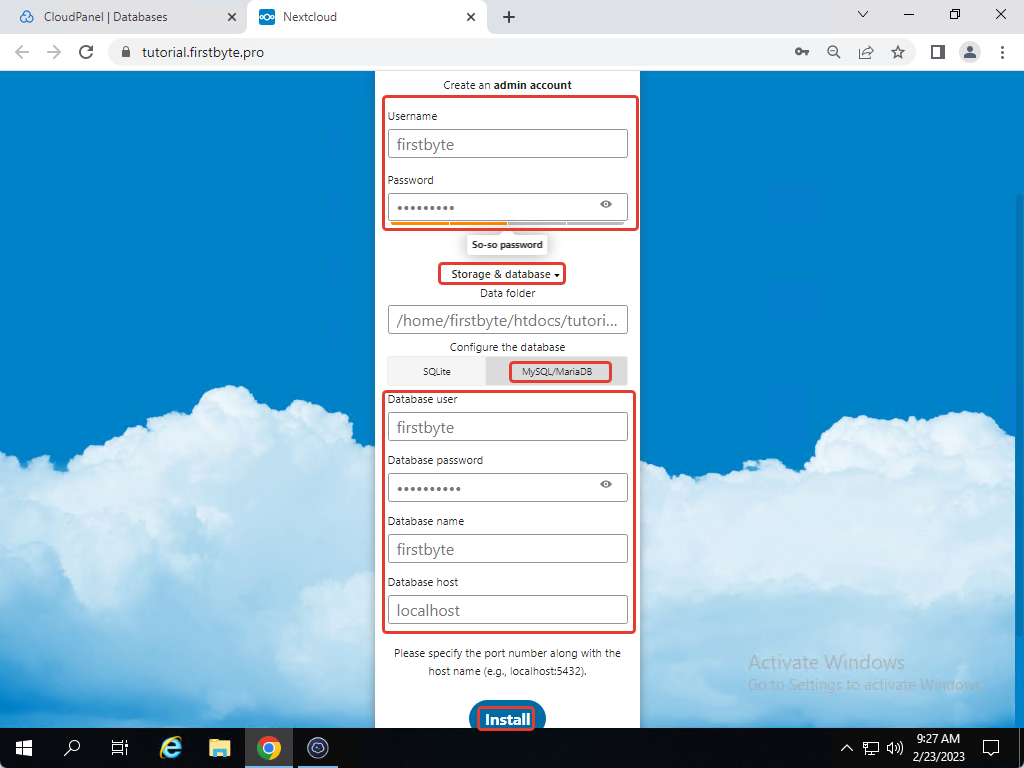
Important! In this example, we are asking you to skip installing, because server freezes because of NextCloud Office.
We will be immediately redirected to “NextCloud” and this step completes the installation of “NextCloud” itself. Now we can move on to installing the application and setting up external storage.
How to install additional apps on NextCloud
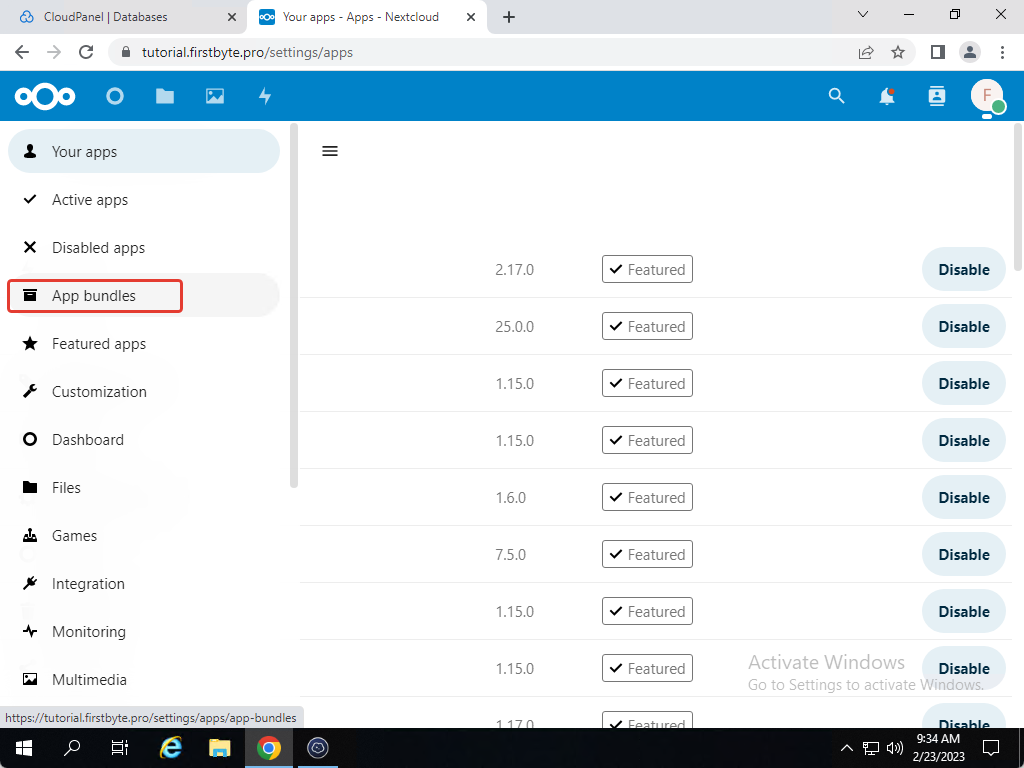
Click on your profile, and then on the “Apps” button
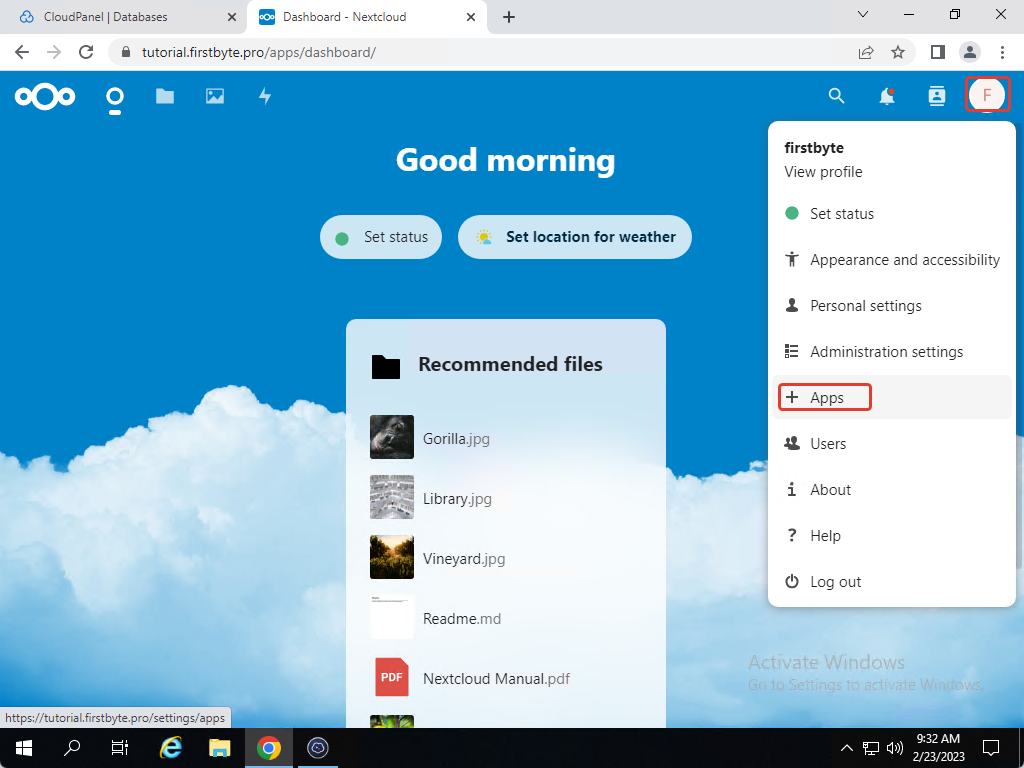
After that, there will be all available applications that we have installed and click on “App bundles”
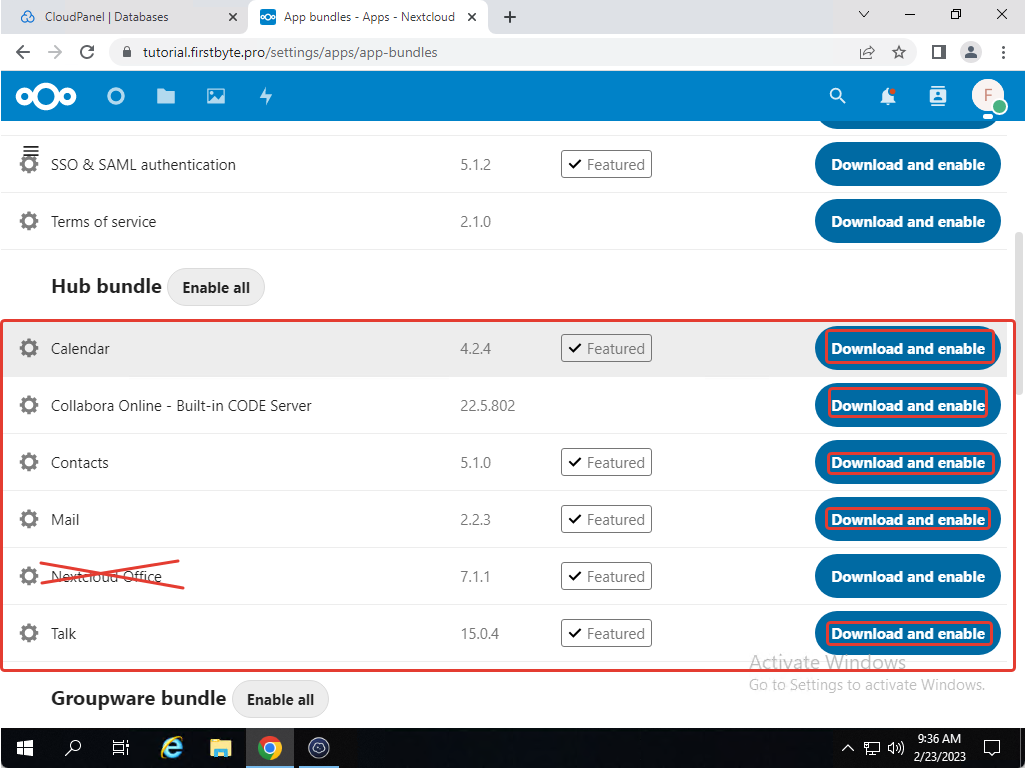
After we have opened the packages, we are search for “Hub bundle” and install everything except “NextCloud Office”!!!!!
Also at the bottom of page, I suggest you install the “Deck” application.
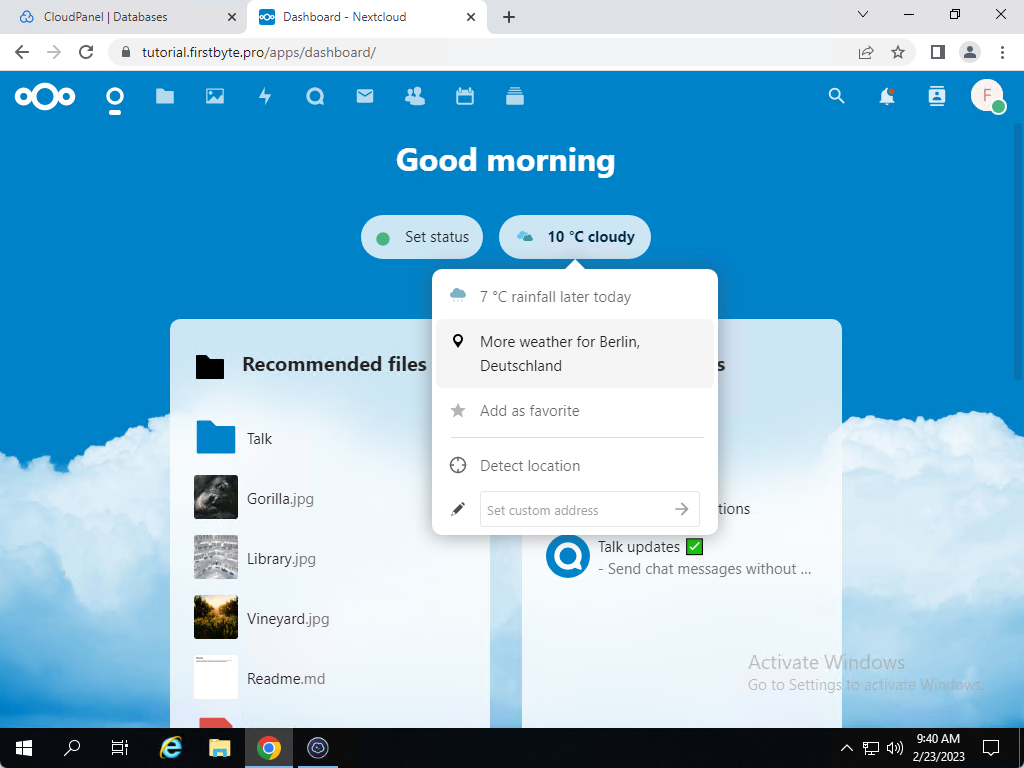
We return to the start page and organize how it will be more convenient for us to work. You can also enter a location to get weather information.
How to connect external FTP storage NextCloud
NextCloud has great functionality! You can connect external FTP storage, SFTP, another NextCloud, Amazon S3, OpenStack and WebDav.
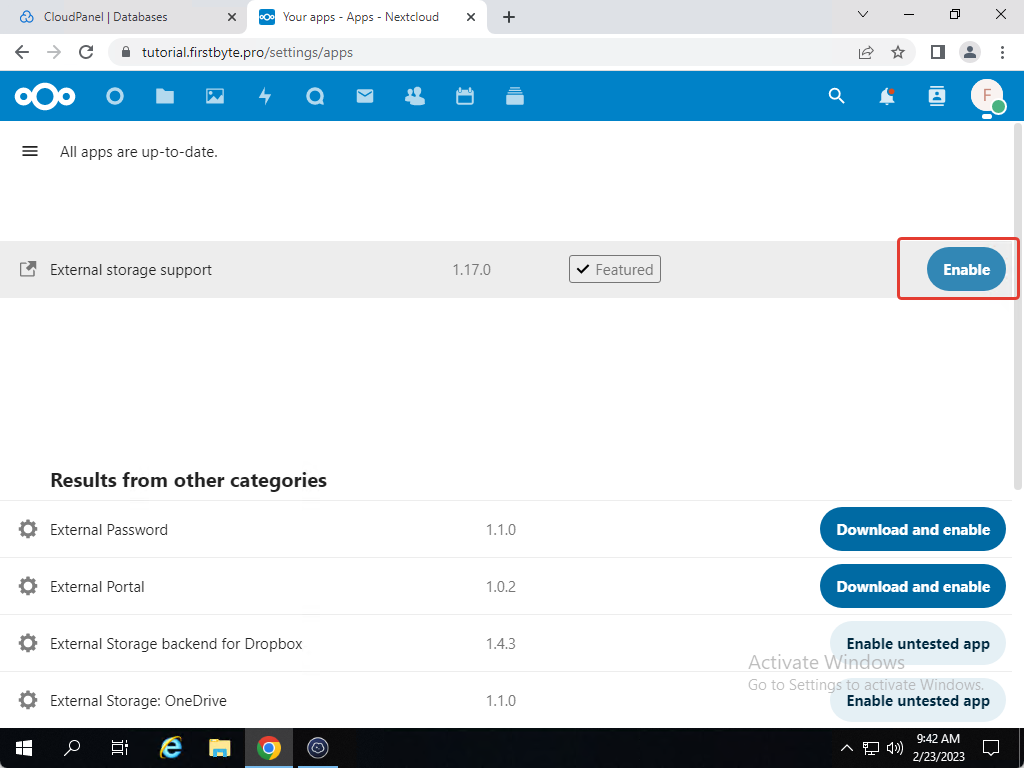
To connect an external FTP storage, we first need to enable this feature.
Click on the profile, then on the “Apps” button.
In the search, we must find “External Storage” and enable it.
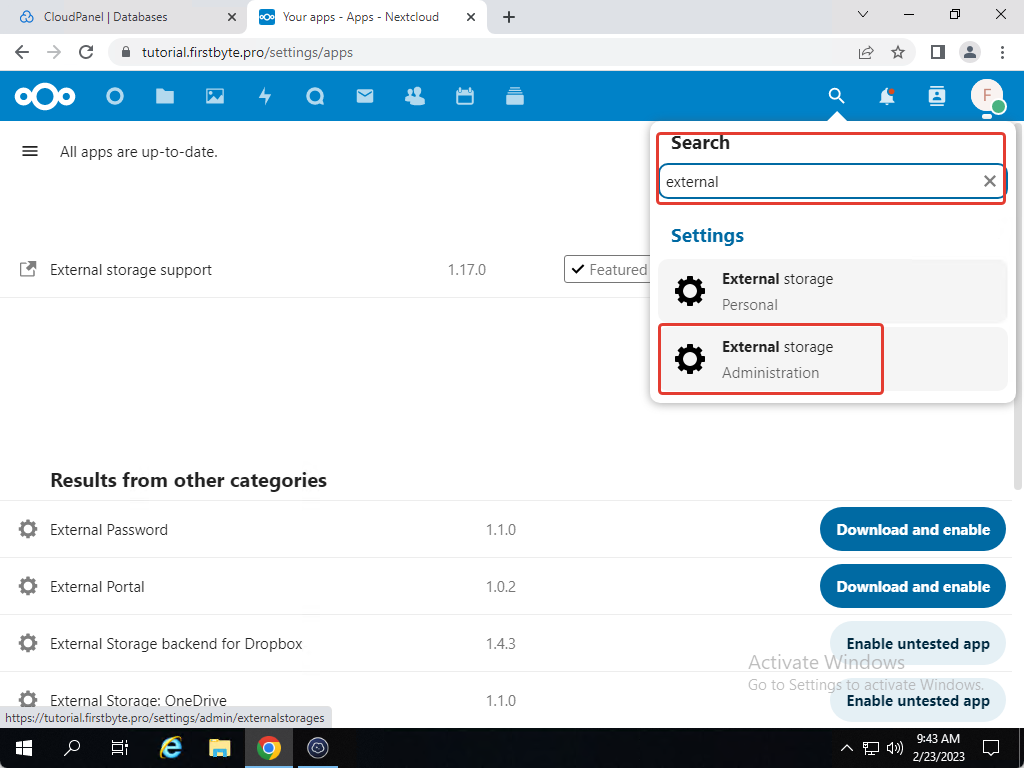
After we have enabled External storage, we must find it in the search.
We write “External storage” and click on “External storage – Administration”
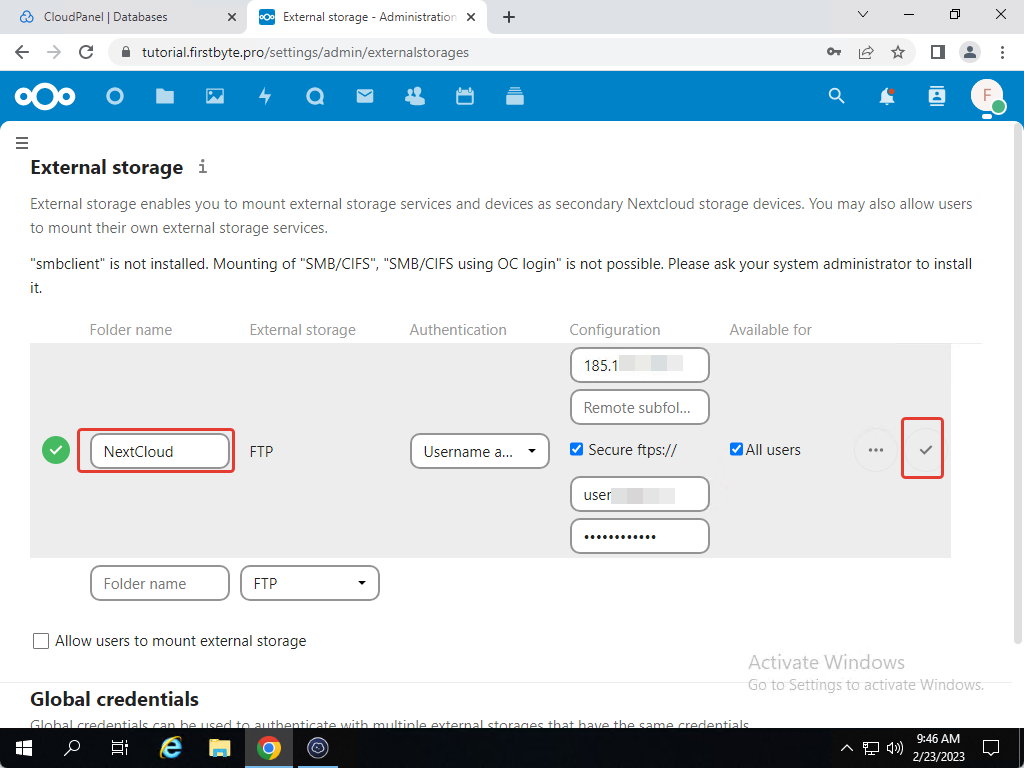
Click on “Add storage” and select “FTP”.
Specify the data of the FTP storage that you bought from us: https://firstbyte.pro/dopuslugi-backup/
Also, do not forget to change the name of the folder from “FTP” to “NextCloud” – if it makes it easier for you to understand what kind of folder you have in “Files”.
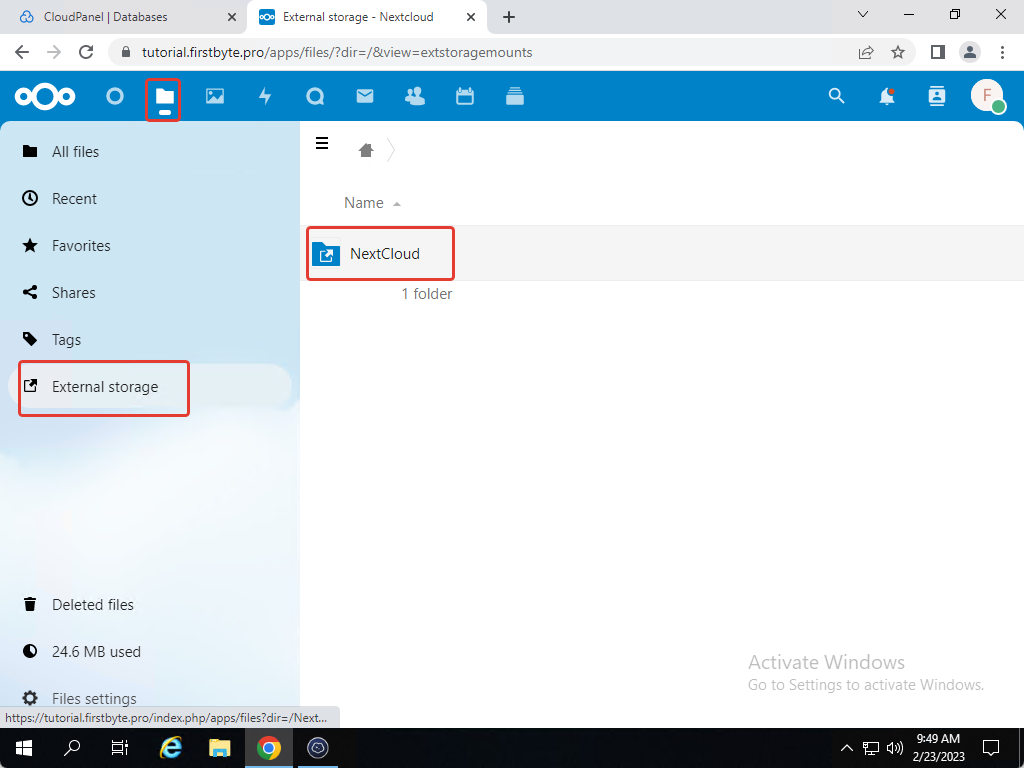
After saving the external storage configuration, click on the folder next to the logo, and then on “External Storage” and here we see our FTP storage folder.
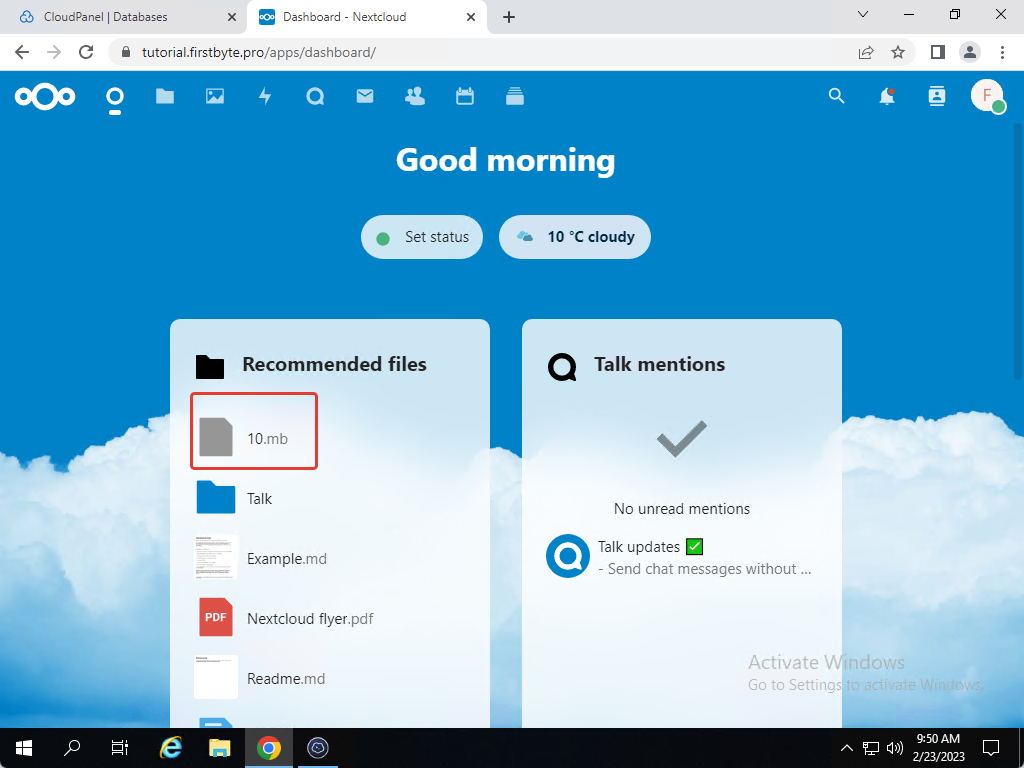
Now we can upload all the data to the FTP storage folder and use it as if it is on a local server disk. We uploaded a test file and it is visible like other local files.
Disclaimer: this software is free and is great for those who do not want to upload their documents to public clouds.