

What is HestiaCP
The free control panel HestiaCP was created from a fork of the popular control panel VestaCP. The main advantages of the panel are: user-friendly interface, a full-fledged site control panel. This panel is sufficient for all typical needs such as web server, mail server, PHP with version selection, database server, SSL certificates and firewall, built-in backup functions.
Where can I install HestiaCP
System requirements of this control panel:
Linux server with at least 1 CPU core, 1GB RAM and 10GB disk space;
Up-to-date Debian-like operating system (RHEL-based OS is not supported);
Privileged account access;
A registered domain with A-records “attached” to your server’s IP address (optional).
How to install HestiaCP
First, we need to connect to our server and run two commands.
The first command is to download the installation script
The second command is to run the installation script and install the panel itself
wget https://raw.githubusercontent.com/hestiacp/hestiacp/release/install/hst-install.sh
bash hst-install.sh
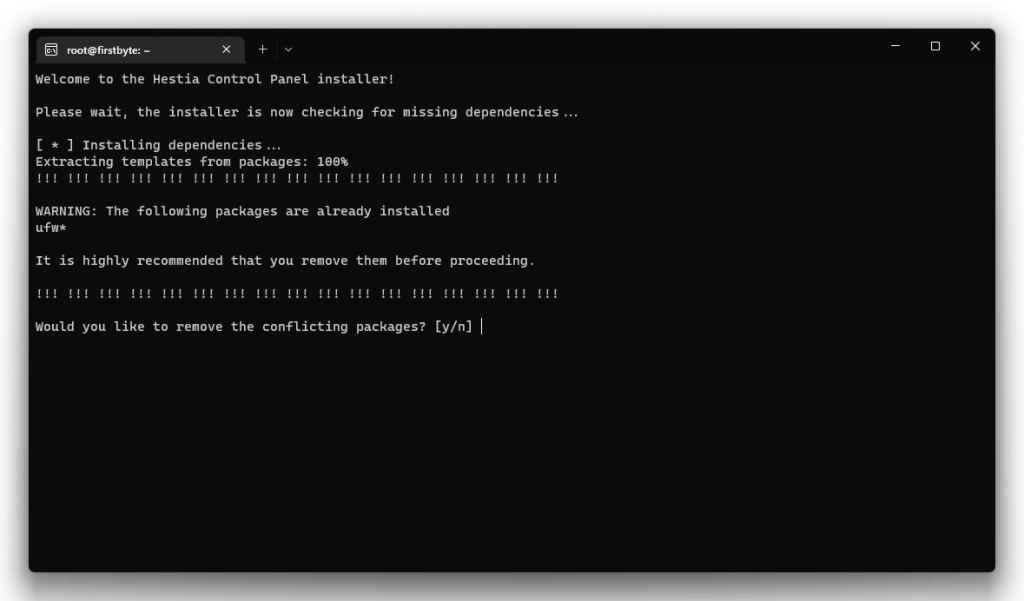
The system checks if there are conflicting packages installed and asks you to remove them – we will do this, since we do have them.
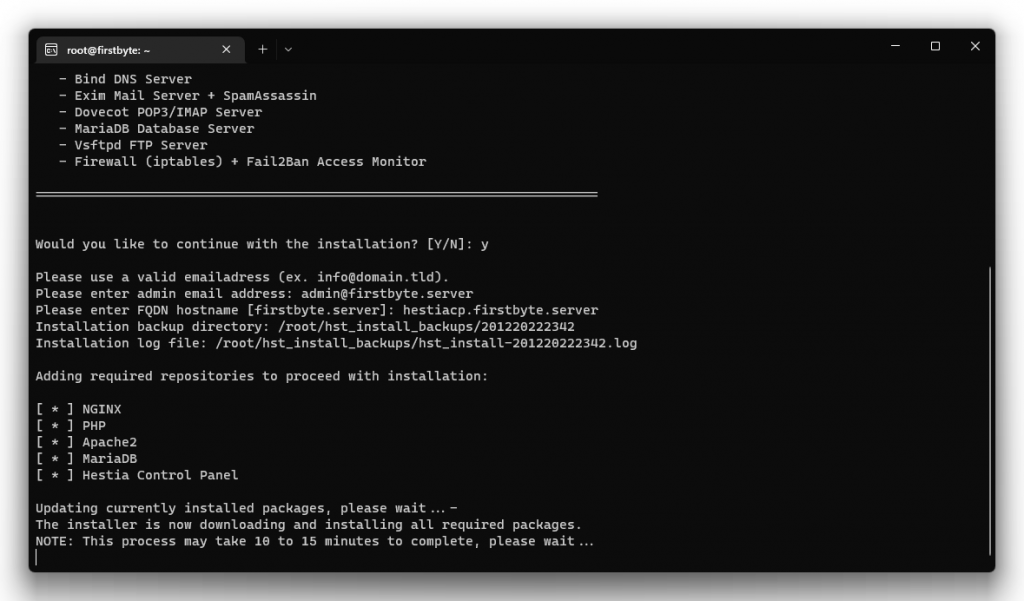
After removal, the script asks us if we want to continue with the installation of the panel. Also, all the services that will be installed are indicated. We write the letter “y”, and then press Enter and specify the administrator’s mail and server hostname (domain name). Installation starts and we wait about 10-15 minutes for it to complete.
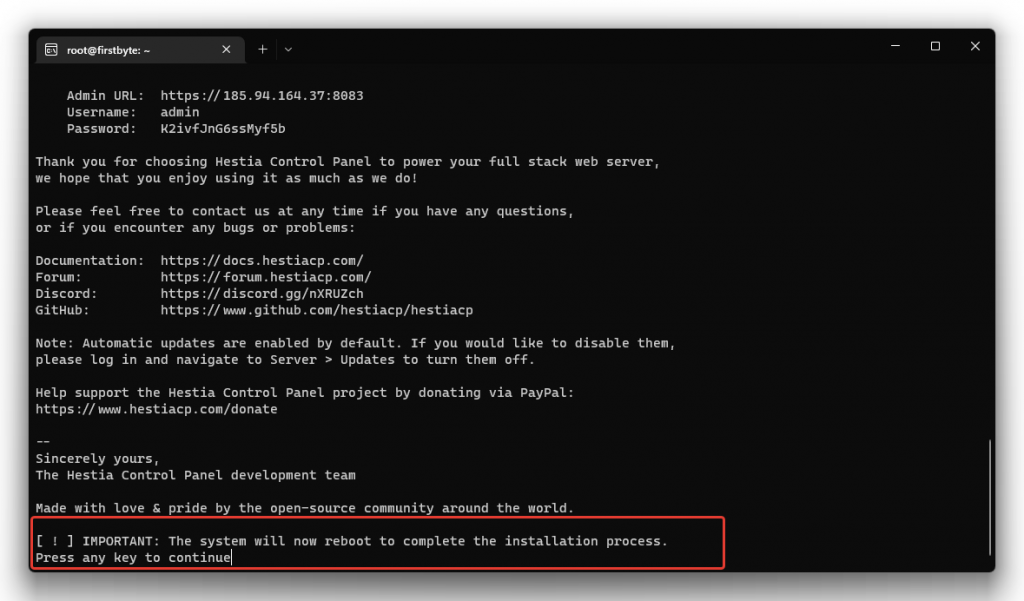
When the installation is completed correctly, the server must be rebooted.
We press Enter and the server goes into reboot and wait about one minute to get up back.
Follow the link https://SERVER-IP:8083 and go to our panel.
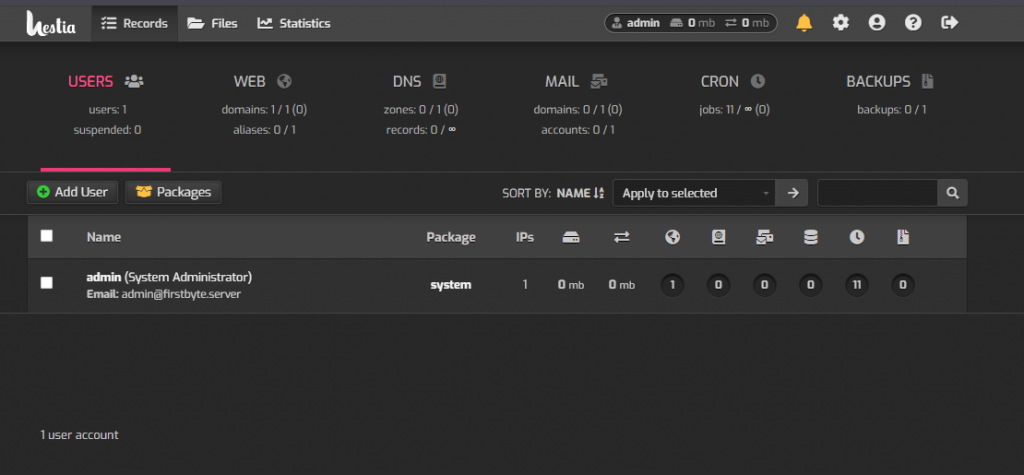
So, you can see now our panel, here you can add and manage your websites, create mailboxes, cronjobs, backups and do more things.