

Often, when working with VDS servers, the question of expanding the disk space of the server may arise. This is a standard procedure, it occurs either automatically after an increase in the tariff plan or at the request of the user through billing.
After technical support has increased the disk space, inside the OS itself it must also be expanded, so that the operating system sees all the available space.
Below we describe how this can be done. To expand disk space, you must first enter the billing and in the Products / Services section click on the Virtual private servers button, then click on your server, and then click on the To panel button and you will be taken to the server control panel.
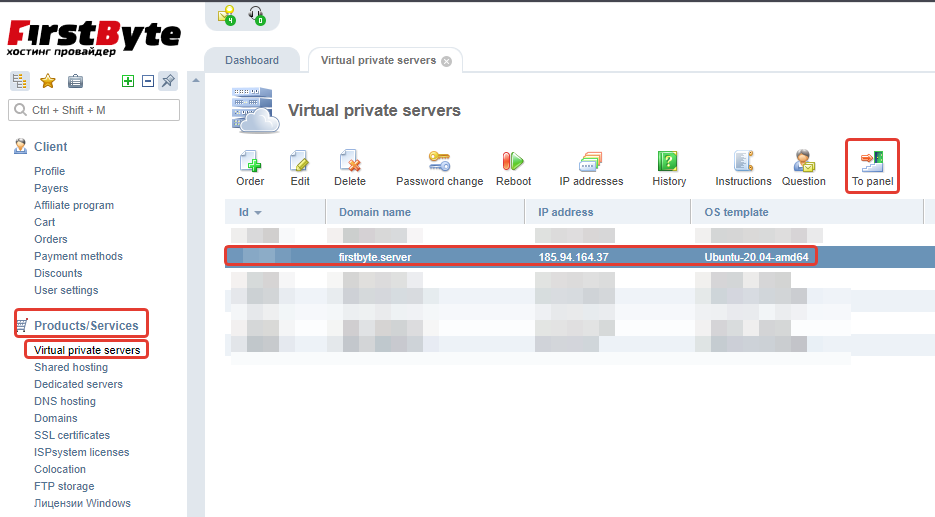
After clicking on the To panel button, a new window will open and you will already be in the server control panel.
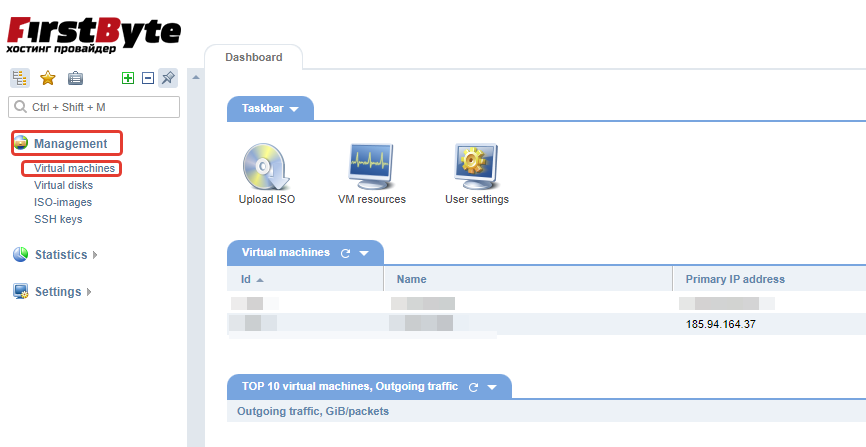
To get to the list of your servers, click on the Manage section, and then on the Virtual Machines button.
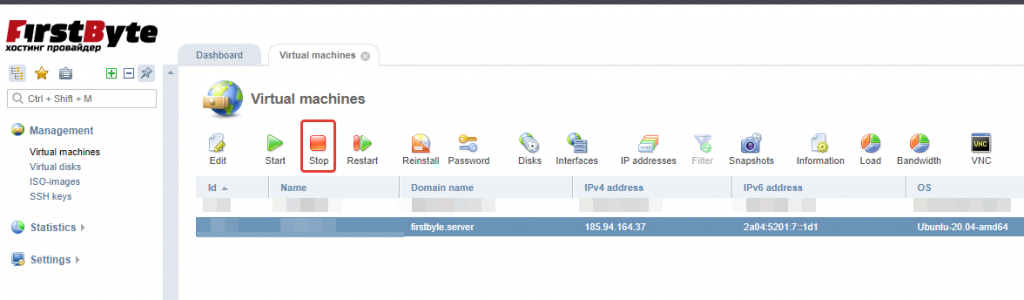
After that, you must click on your server, then on the Stop button to stop the server.
Next, we must click on the Disks button so that we can mount the “gParted” boot image.
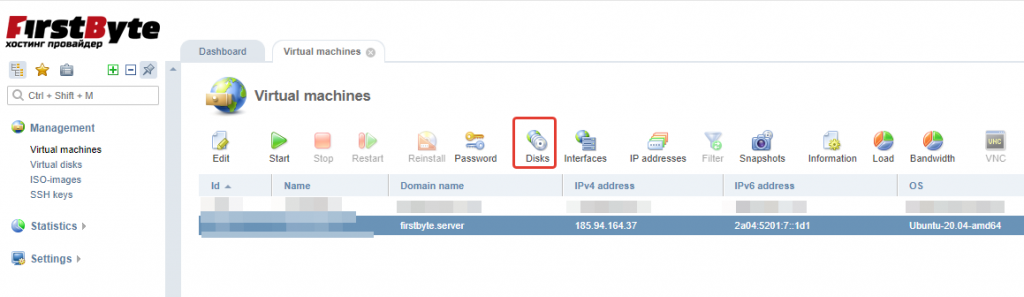
After clicking on the Disks button, you will see such a picture and here you can see the virtual disk of your virtual server. Click on the ISO button to mount the “gParted” boot image.
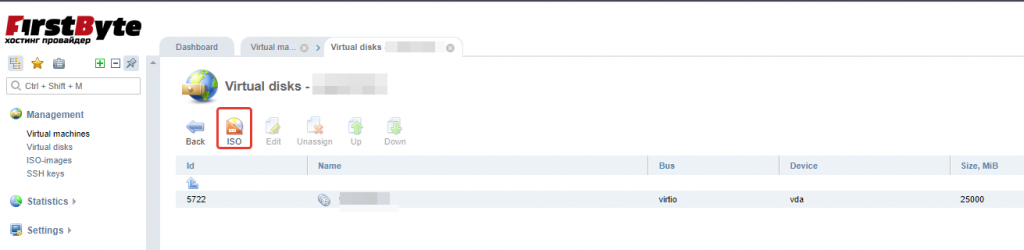
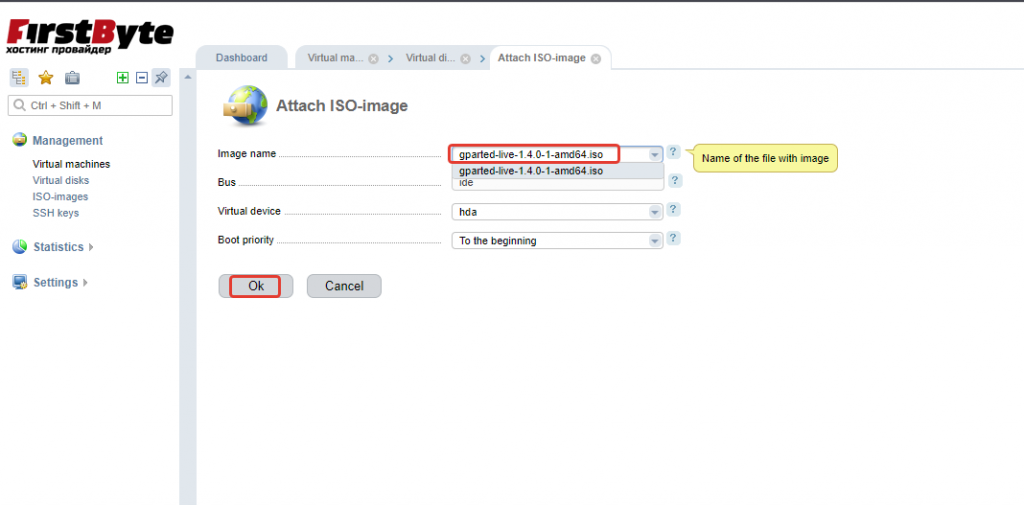
You will see a list of all available ISO images. We select gParted and click OK. After this action, we will be returned to the Disks page, and gParted itself will be mounted to the server.
Now we must return to the Virtual Machines page and click on the Start button, and after that we quickly go to VNC.
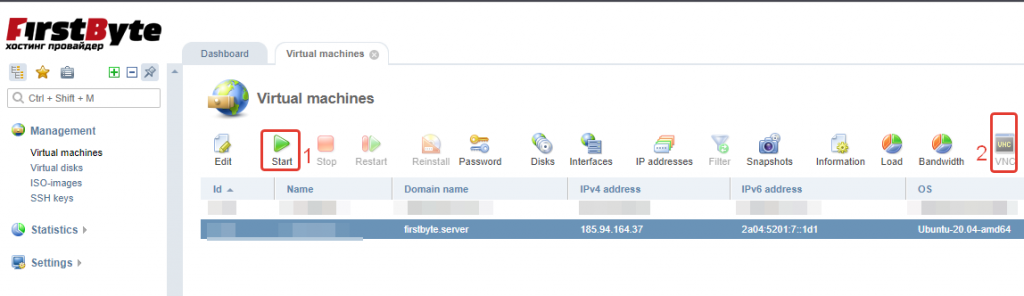
IMPORTANT! If you clicked on VNC and the OS has already booted there, you should just press the button Ctrl+Alt+Del in VNC and the server will reboot. After it has rebooted, press Esc and the number 1. on your keyboard.
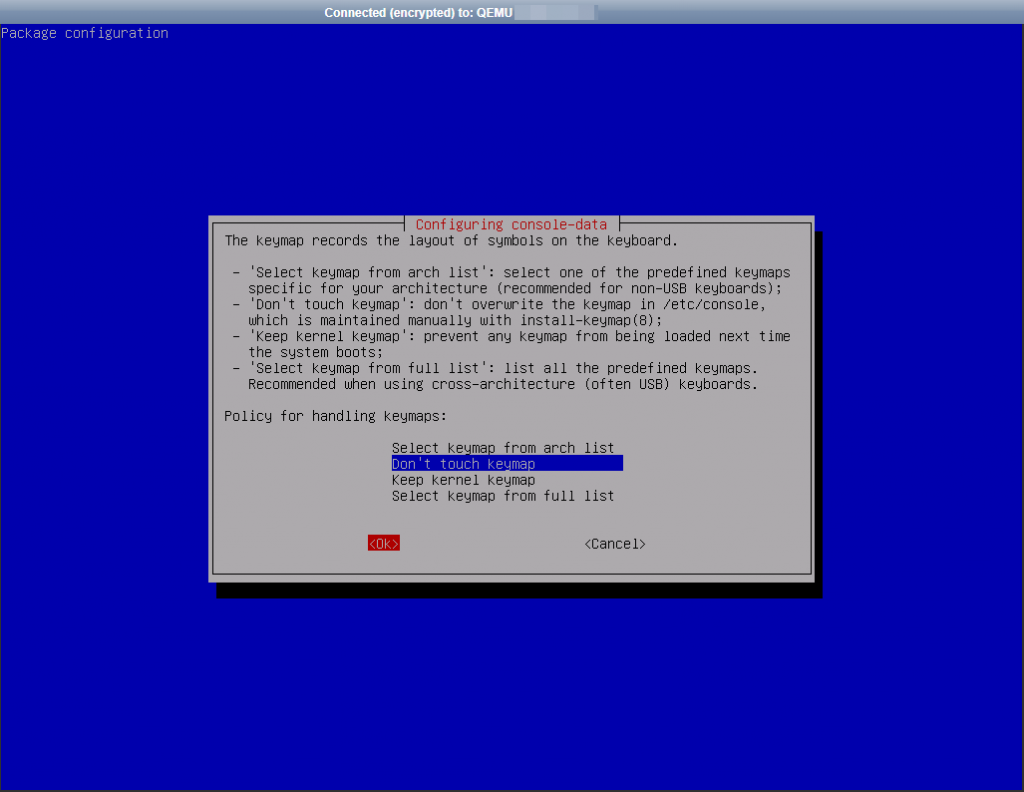
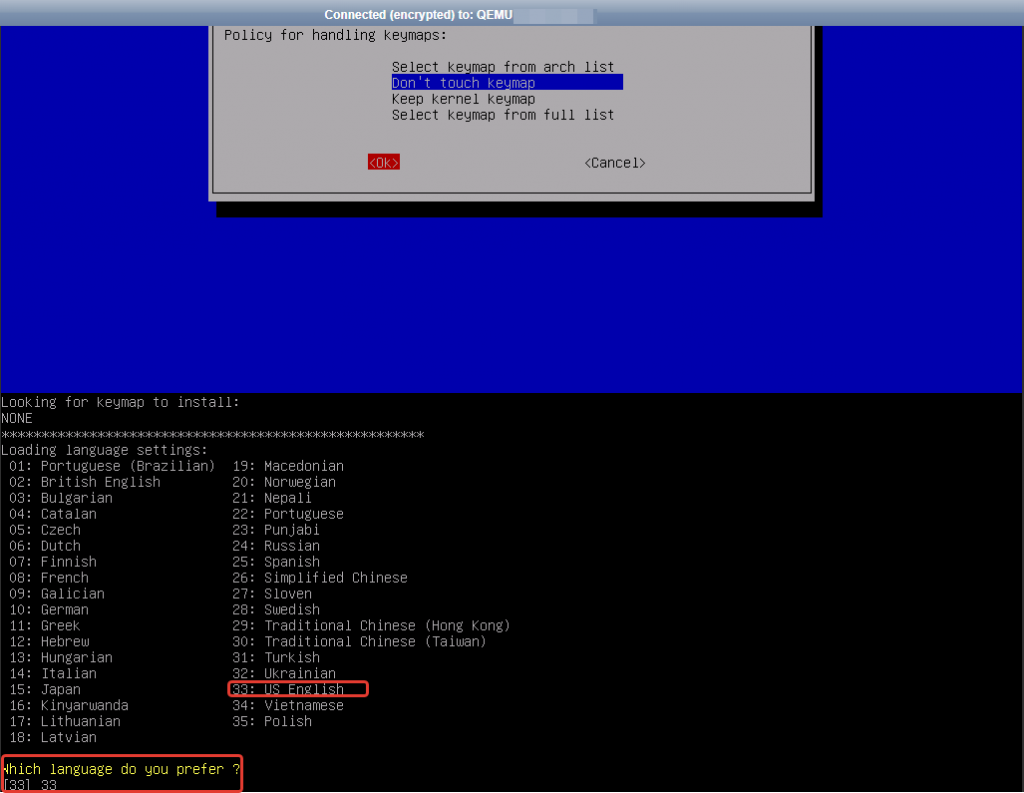
In the first step, select Don’t touch keymap, press TAB, and then Enter
We are then asked by “gParted” which language we want to choose. We specified 33 and pressed Enter – i.e. we chosed English.
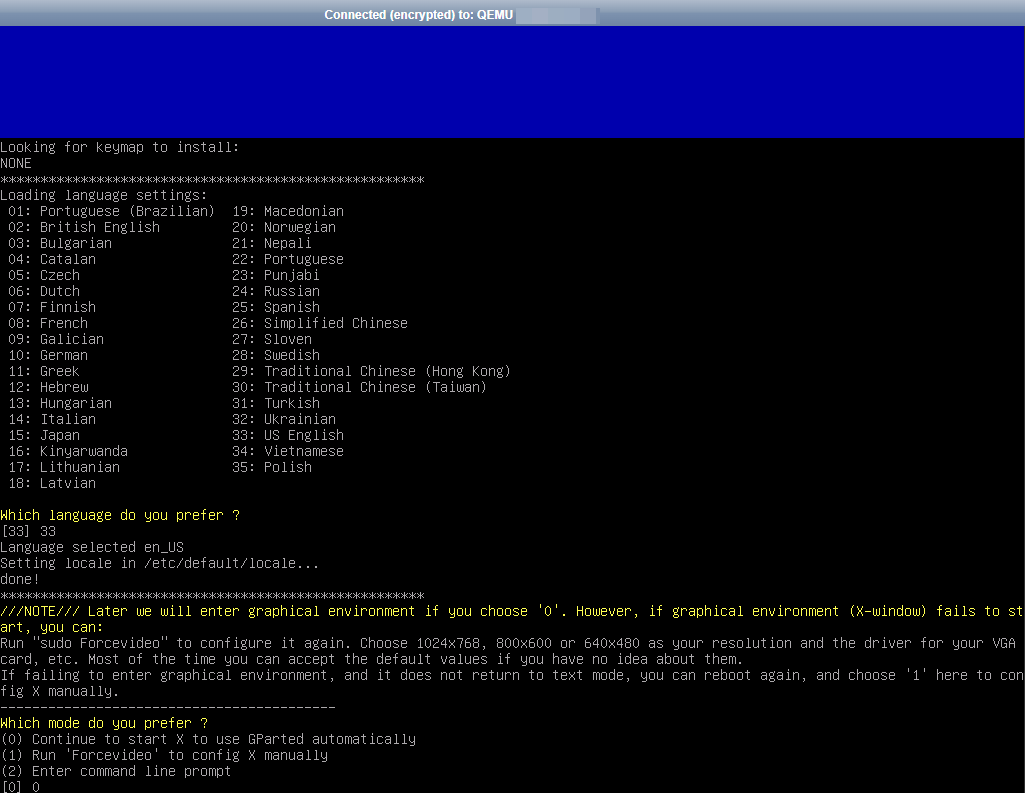
To enter the system itself, click on the number 0, and then click on Enter.
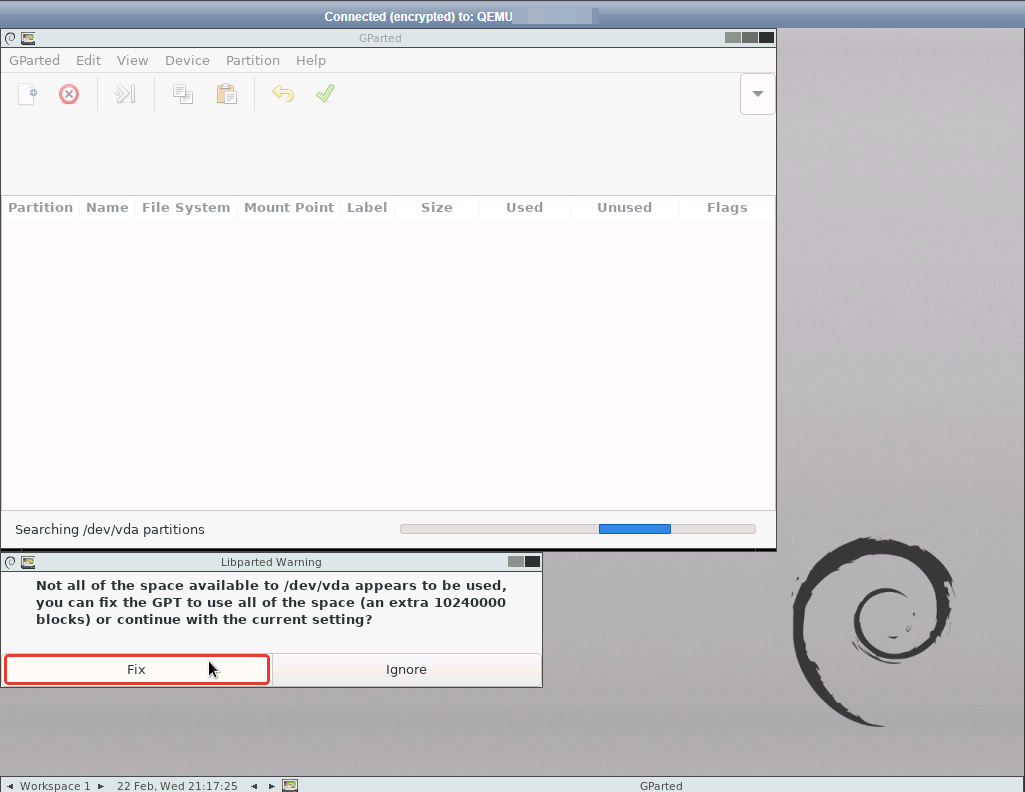
Now on the screen you will see the “gParted system” itself, as well as the program itself with which we will expand the space.
To make the disk partitions appear, we click on the Fix button.
After this action, we will see our virtual disk and its partitions in gParted.
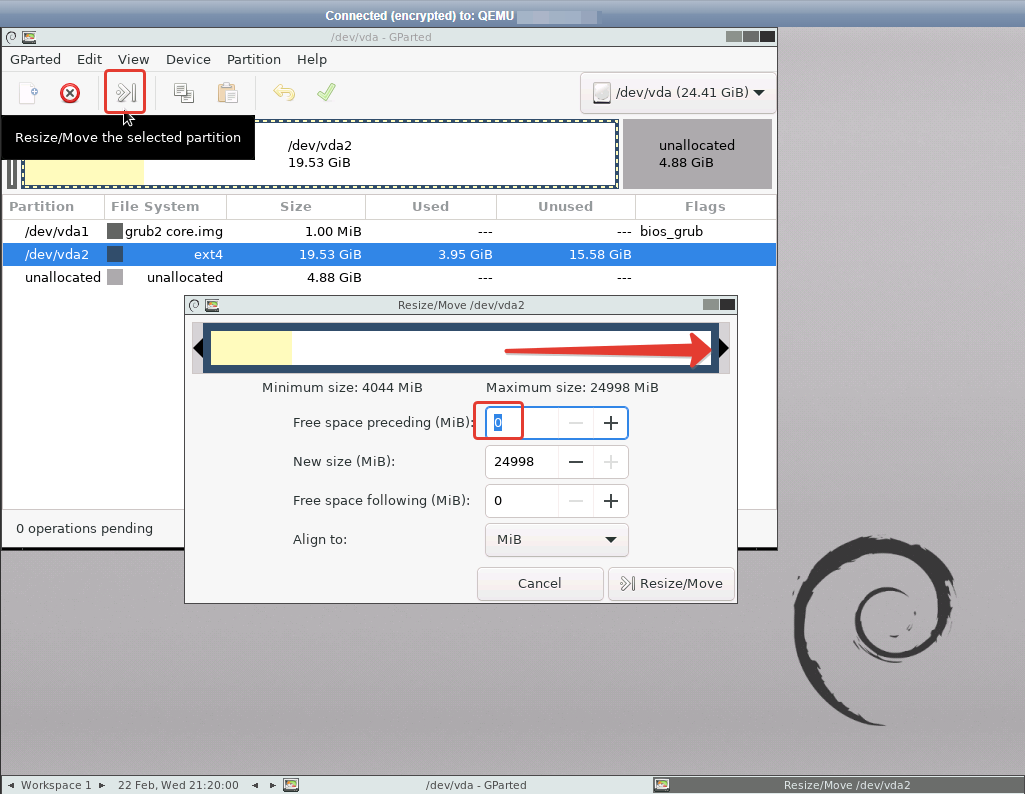
The partition where the OS disk itself is located is always /dev/vda2 and we should always expand it.
Click on /dev/vda2 and click on Resize/Move icon
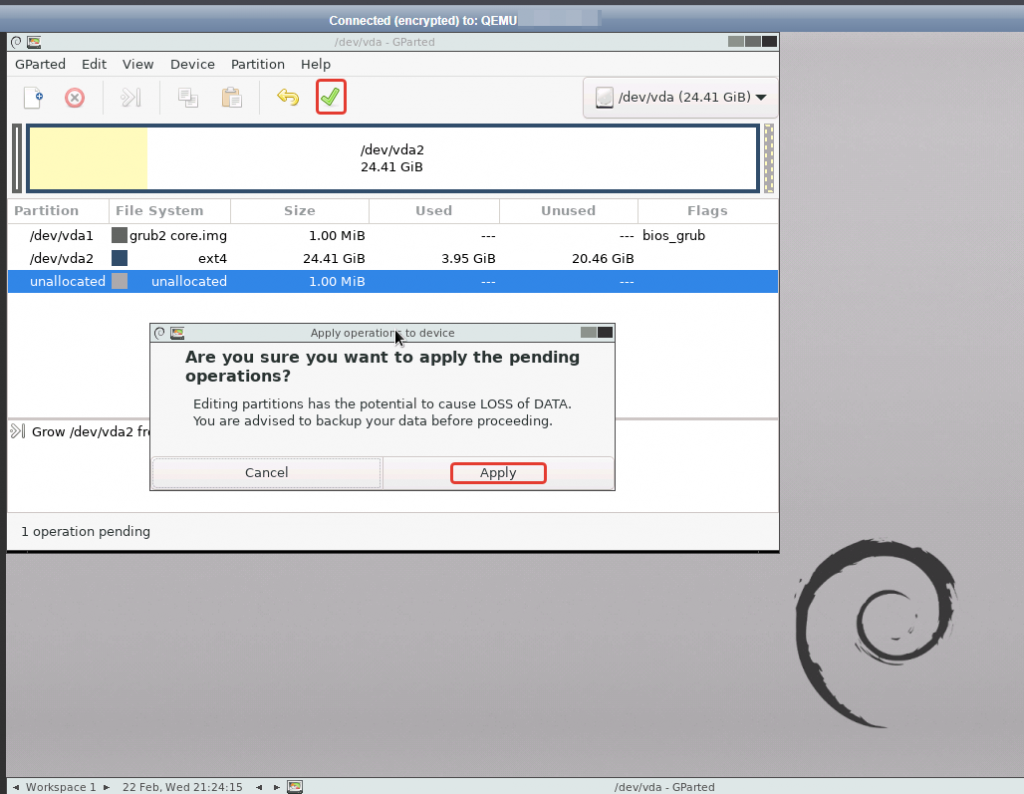
After clicking on the Resize/Move button, we will see a slider that needs to be moved to the right side so that 0MB remains in Free space preceding (MiB). Click on the Resize/Move button to apply.
To expand the partition and to confirm our action, we need do click on the check mark ✔ and apply our changes.
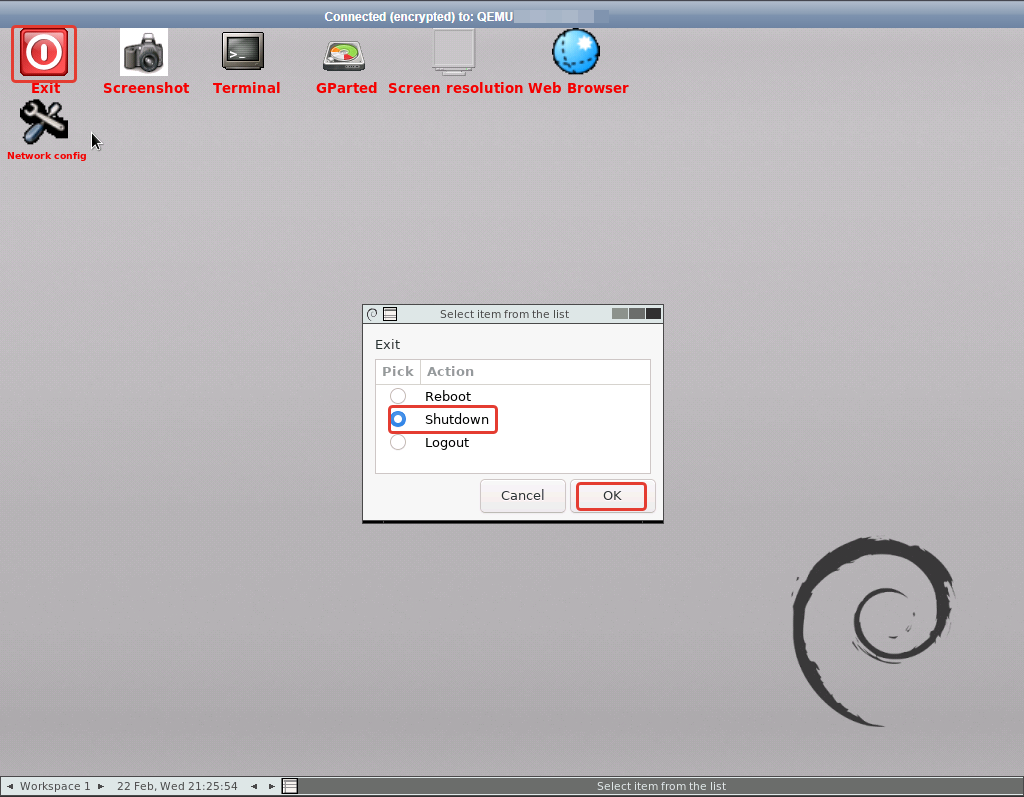
After successfully expanding the partition, on the server, click on the Exit icon, then on Shutdown, and then on OK and after that press any button in the console to disconnect the ISO.
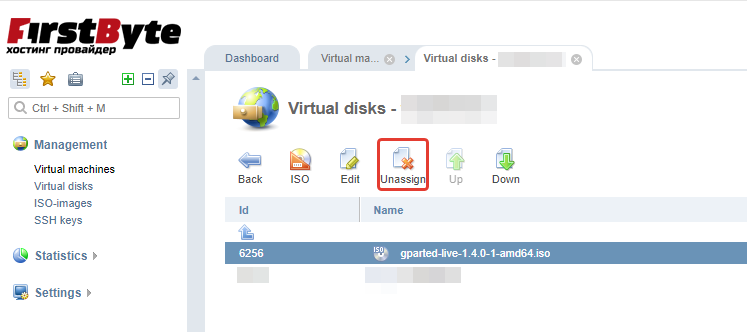
Close VNC and go back to the Disks section and, as the server is turned off, disconnect the gParted boot image itself. Click on gParted.iso and then on the Unassing button.
Go to the Virtual machines page, click on the Start button and start your server, and that’s it all!
To see if we really increased the disk space, we can log into our server and run the “df -h” command.
It is also possible to perform similar manipulations in Windows VDS.