

What is .NET Framework
The .NET Framework is a software development platform developed by Microsoft for building and running Windows applications. The .NET platform consists of tools, programming languages, and libraries for building desktop and web applications. It is also used to create websites, web services and games.
Why do we need .NET Framework 3.5
Most modern Windows applications require the .NET Framework to be installed. For example, NET Framework 4.8 is installed by default on Windows 11/10 and Windows Server 2022/2019. However, some older and legacy applications require .NET Framework 3.5, 2.0, or even 1.0 to be installed.
In this article, we will guide you on how to install .NET 3.5 on Windows 11/10/8.1 and Windows Server 2022/2019/2016/2012R2.
How to install .NET Framework 3.5
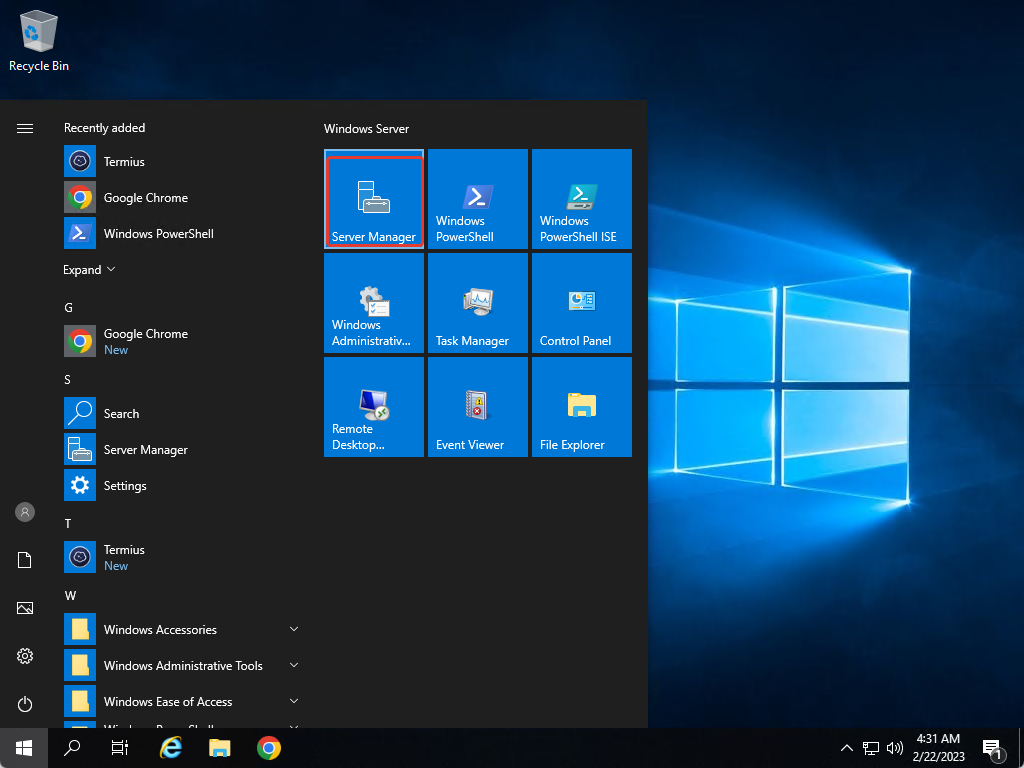
To install “.NET Framework 3.5” you must first log into your server.
Then click on “Start” and open “Server Manager”.
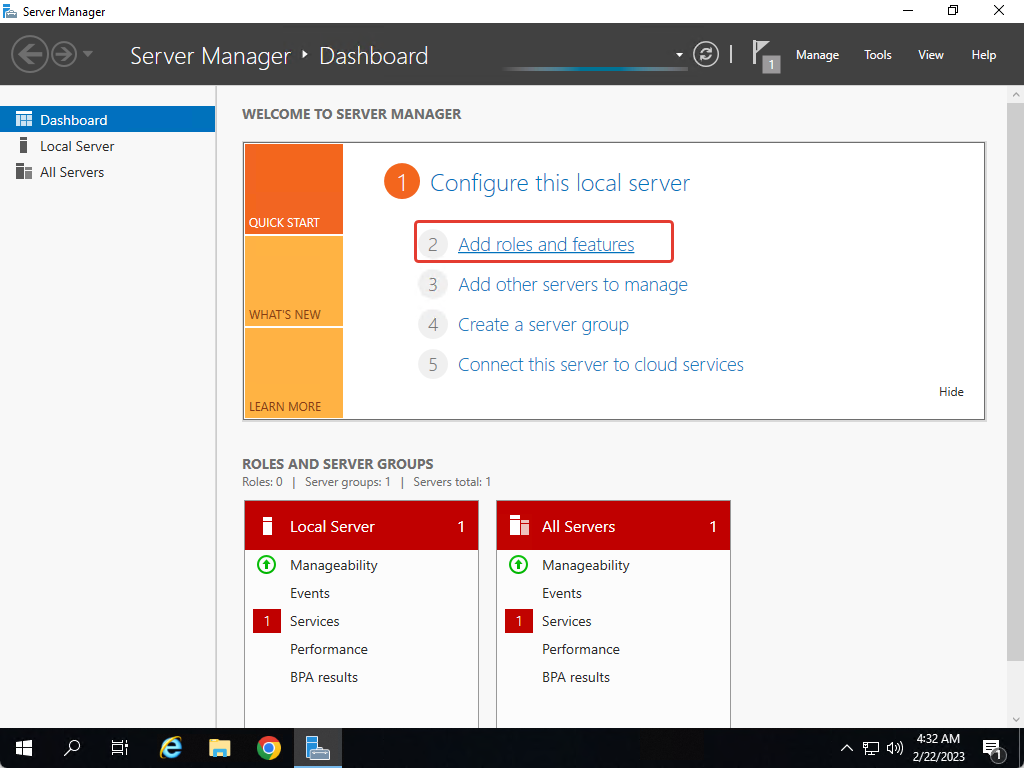
After the “Server Manager” opens, click on “Add Roles and Features”
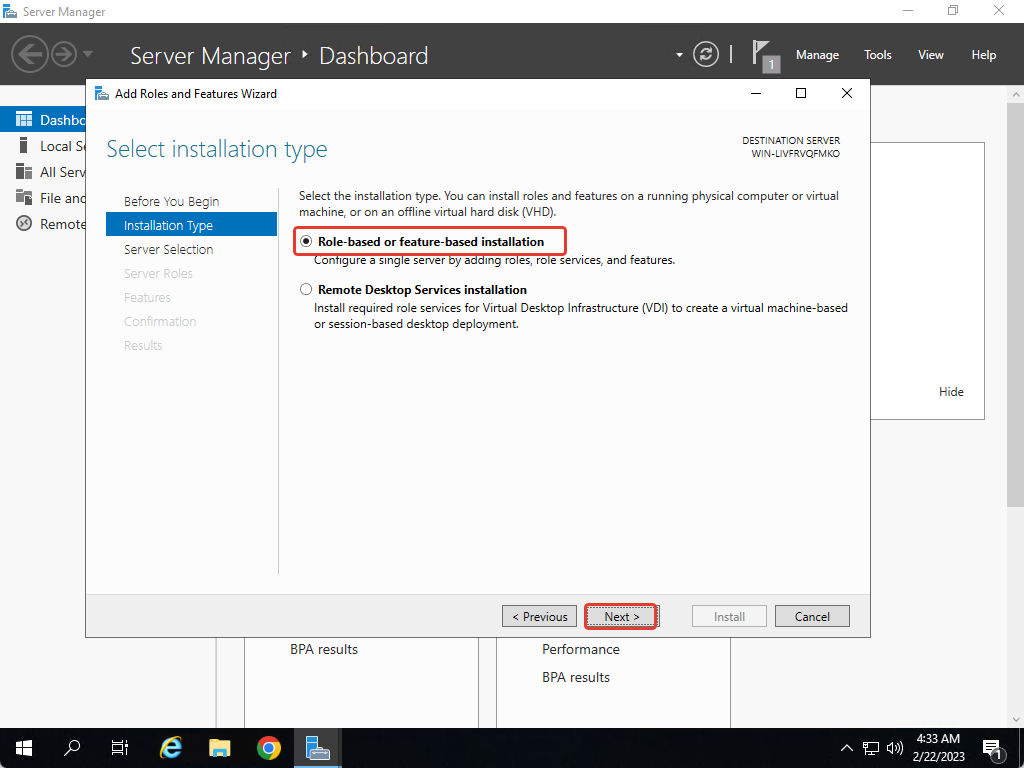
An popup window opens and we perform the following steps:
- Step – Before you begin – click on Next
- Step – Choose – Role-based or feature-based installation – click on Next
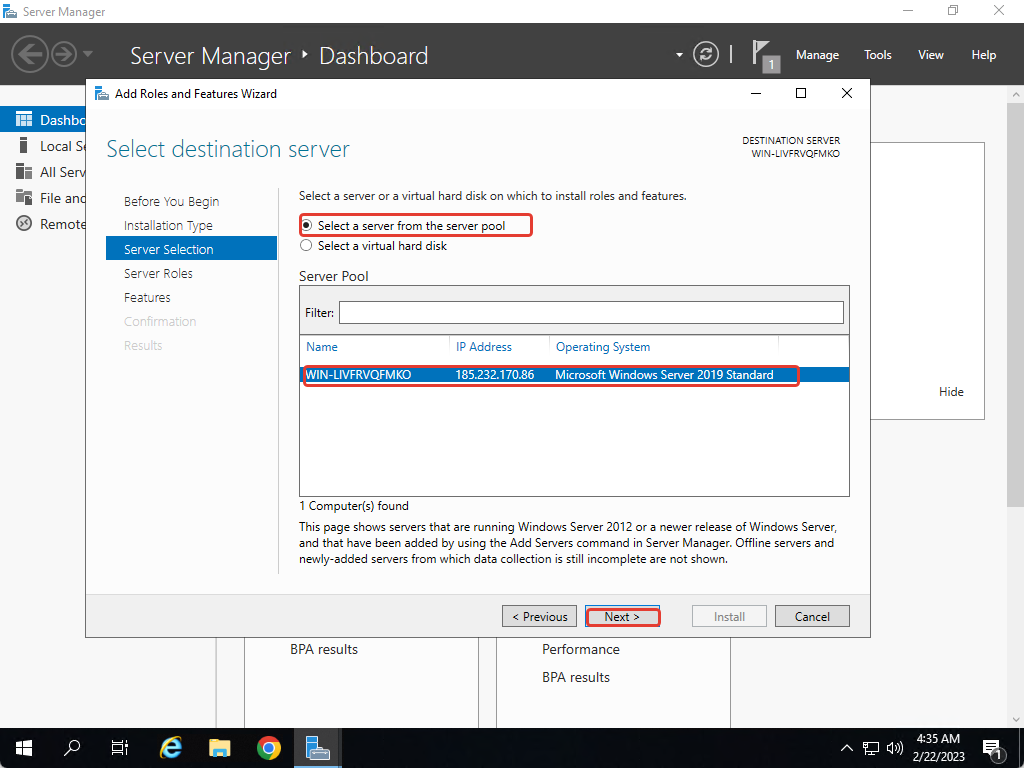
3. Step – Server Selection – leave it as it is and click on Next
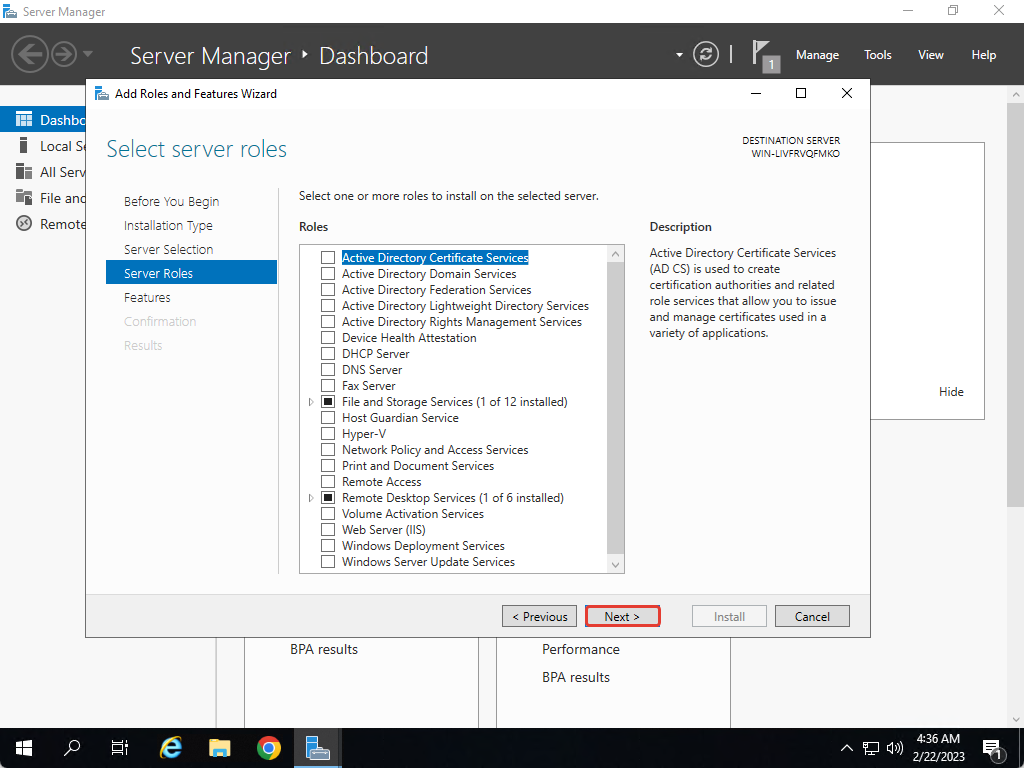
4. Step – Server Roles – Here we also do not touch anything and click on Next
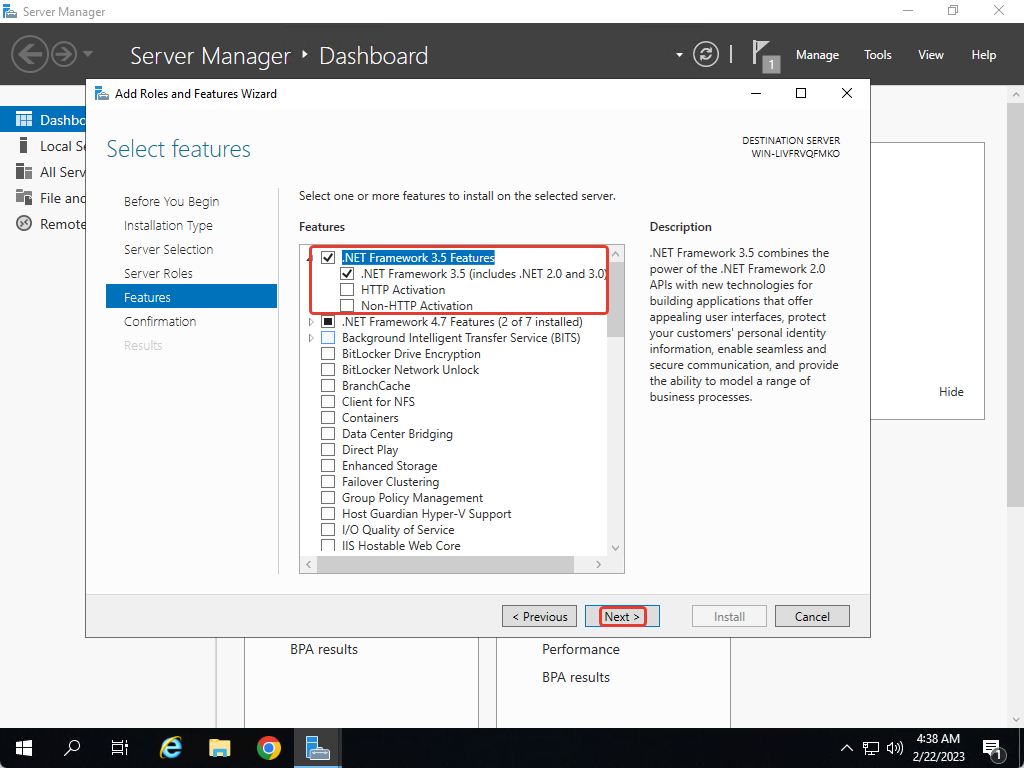
5. Step – Features – Select “.NET Framework 3.5 Features” and click on Next
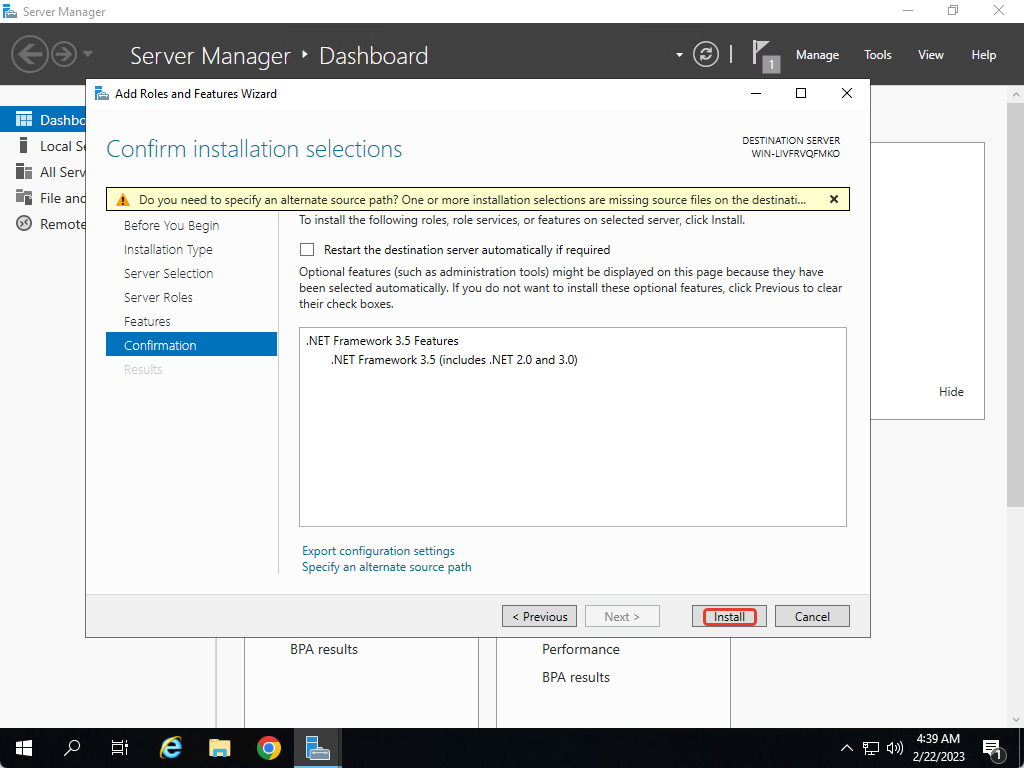
6. Step – Click on Install and wait for the “.NET Framework 3.5” to be installed.
After “.NET Framework 3.5″ is installed, we will see the following result.

We can close the window and continue with the installation of software that needs “.NET Framework 3.5” to work.