

Why is it recommended to change the port in Windows Server
It often happens that hackers scan ports and guess passwords to access your server. By default, RDP uses port 3389. If you set a very simple password, an hacker will gain access to your server and use it for their own purposes, or encrypt all data and ask you for money. The problem due to port scanning can also be that due to many bots attempts, you will not be able to enter the server. This can overload the resources of the server. If you have such a suspicion, it is strongly recommended to protect the RDP port from bots by changing it to any port to the range from 1000 to 65535.
How to change RDP port in Windows Server?
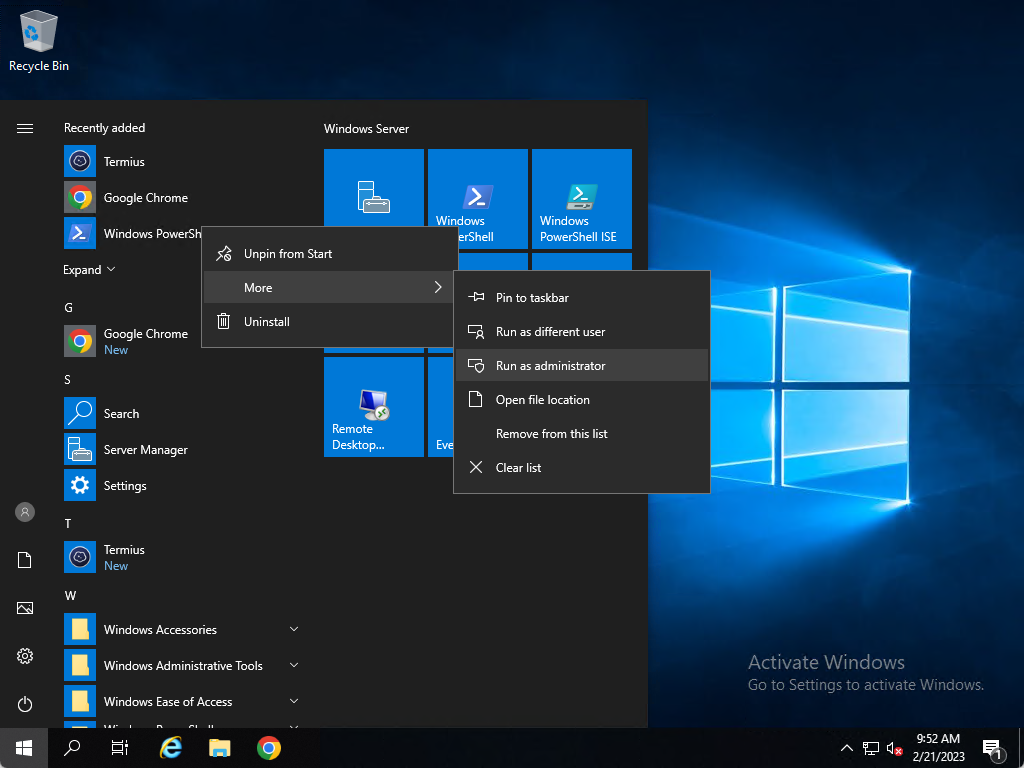
To begin with the process, we must connect to our server and open “PowerShell”.
Click on “Start”, then on “PowerShell”. You must select the option to run “As Administrator”. Suppose we want to change the port to 1312. After PowerShell has opened, we execute this command.
You can specify any other port you want, such as 7777, 8888, 20000, etc.
After the PowerShell is opened, paste this command and hit the Enter to execute it.
Set-ItemProperty -Path "HKLM:\System\CurrentControlSet\Control\Terminal Server\WinStations\RDP-Tcp\" -Name PortNumber -Value 1312
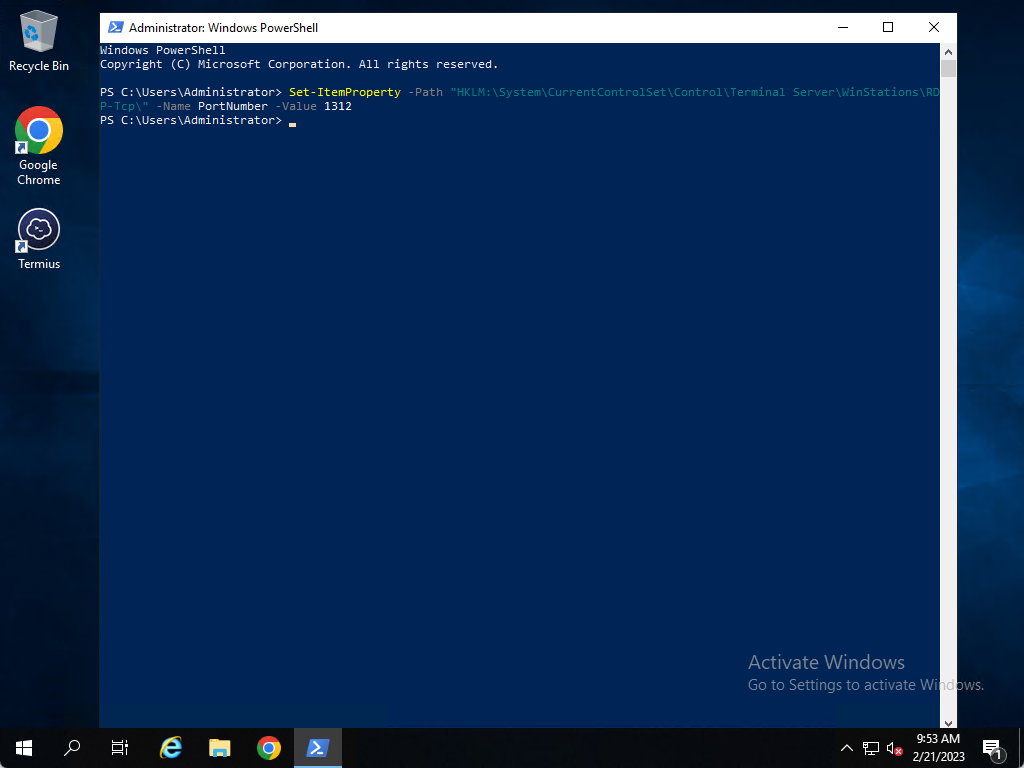
After executing the command, we see that there is no answer from the server, which means that we made the changes correctly.
How to open RDP port
Now we can’t just connect to our server, because we have “Firewall turned on” and the port does not work immediately after changing to another one.
We have to open a new port. Click on “Start” again, then on “Control Panel”.
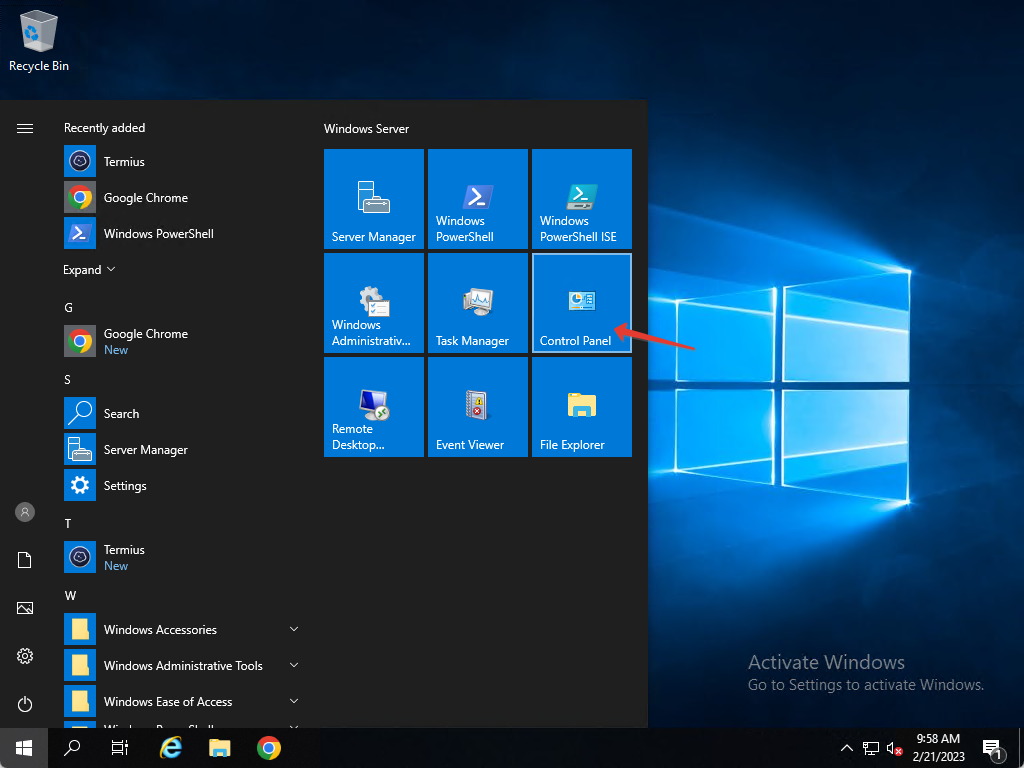
When the Control Panel has opened, we click on “System and Security”
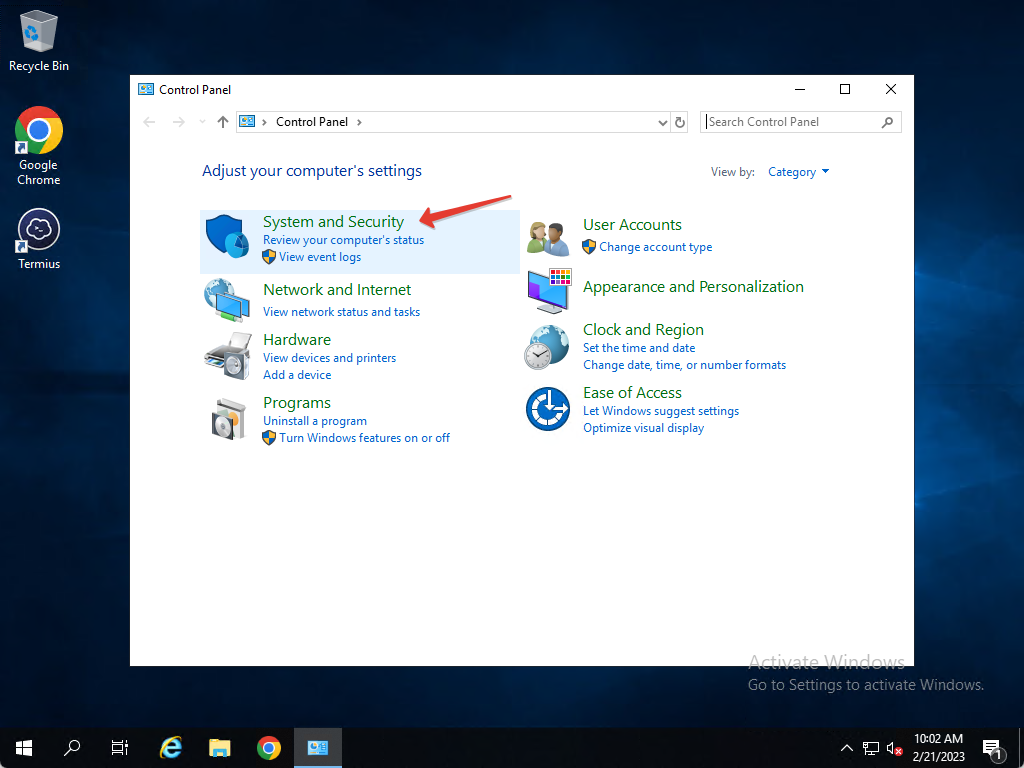
Then click on “Windows Defender Firewall” and after that on “Advanced Settings”

Here we have to open the port. Click on “Inbound Rules”, then on “New Rule…”.
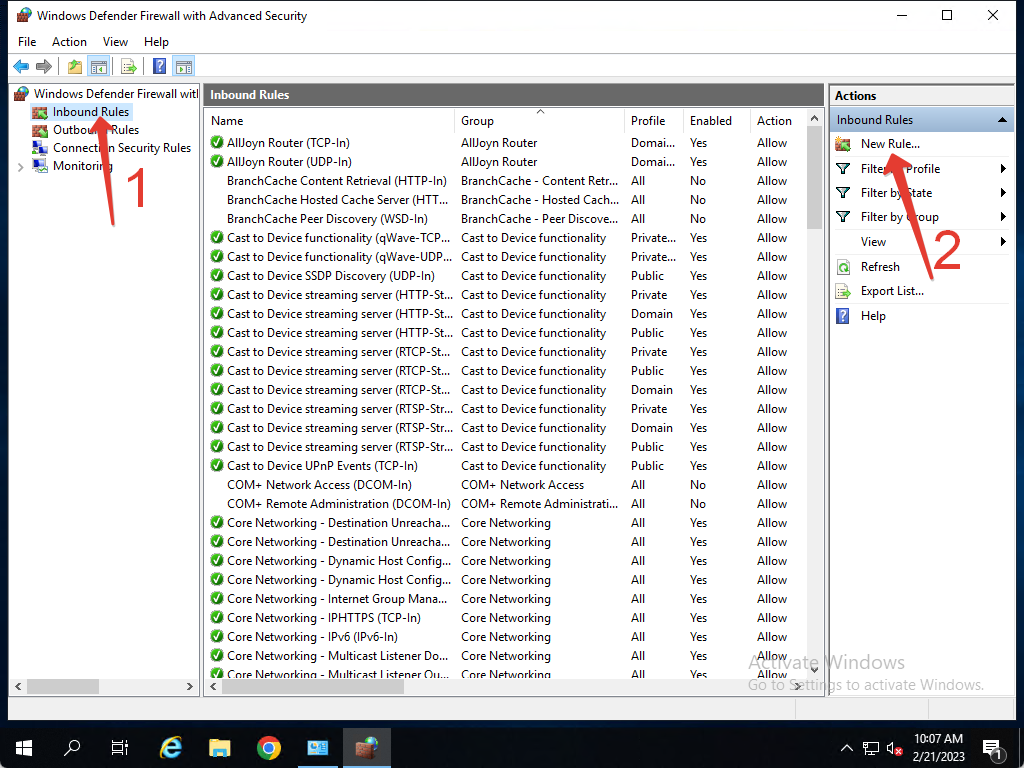
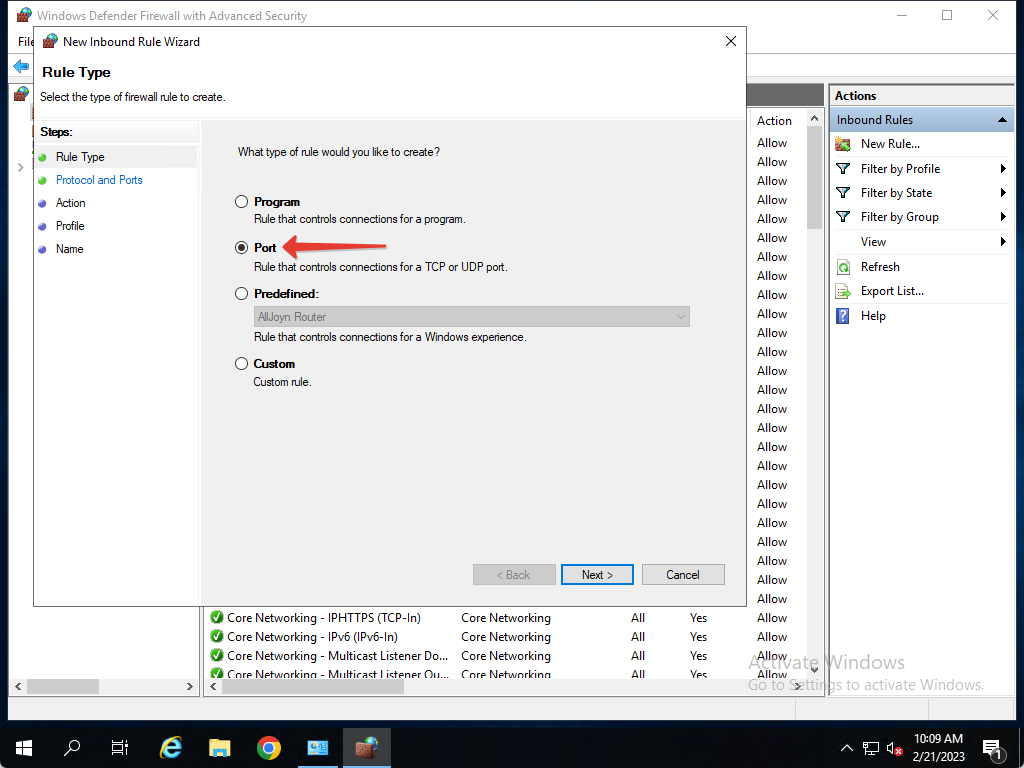
Select “Port”, then click “Next”.
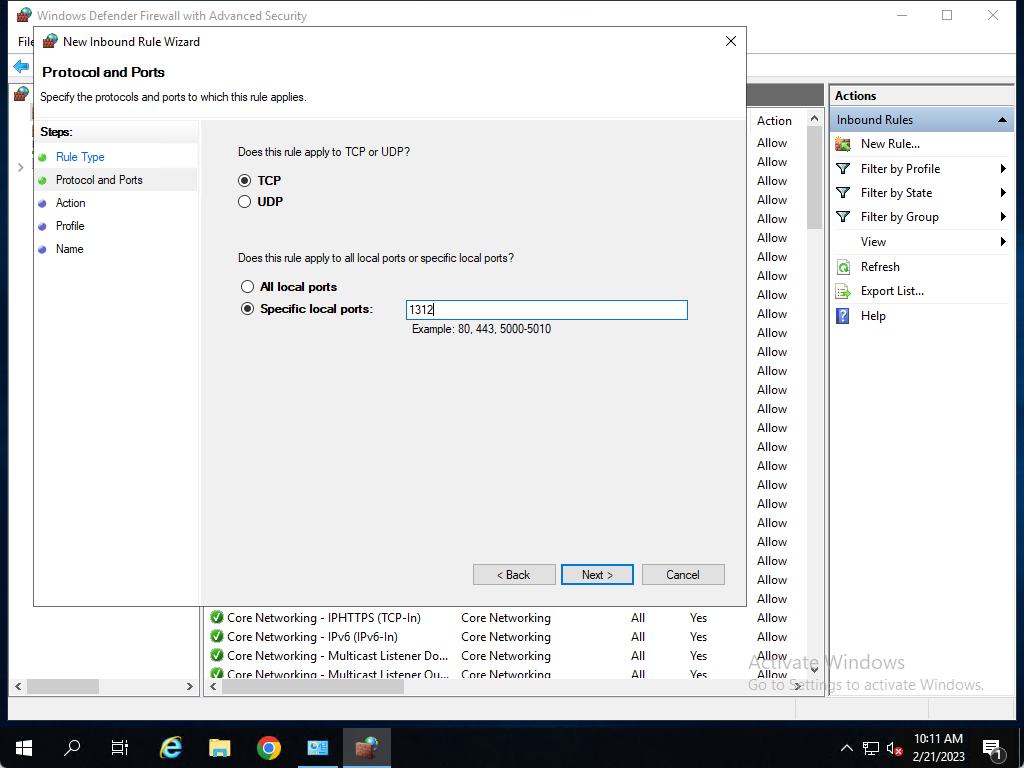
We write down our port, which we specified in the command in “PowerShell” and click on “Next”
Leave everything as it is in the “Action” and “Profile” sections and click “Next”.
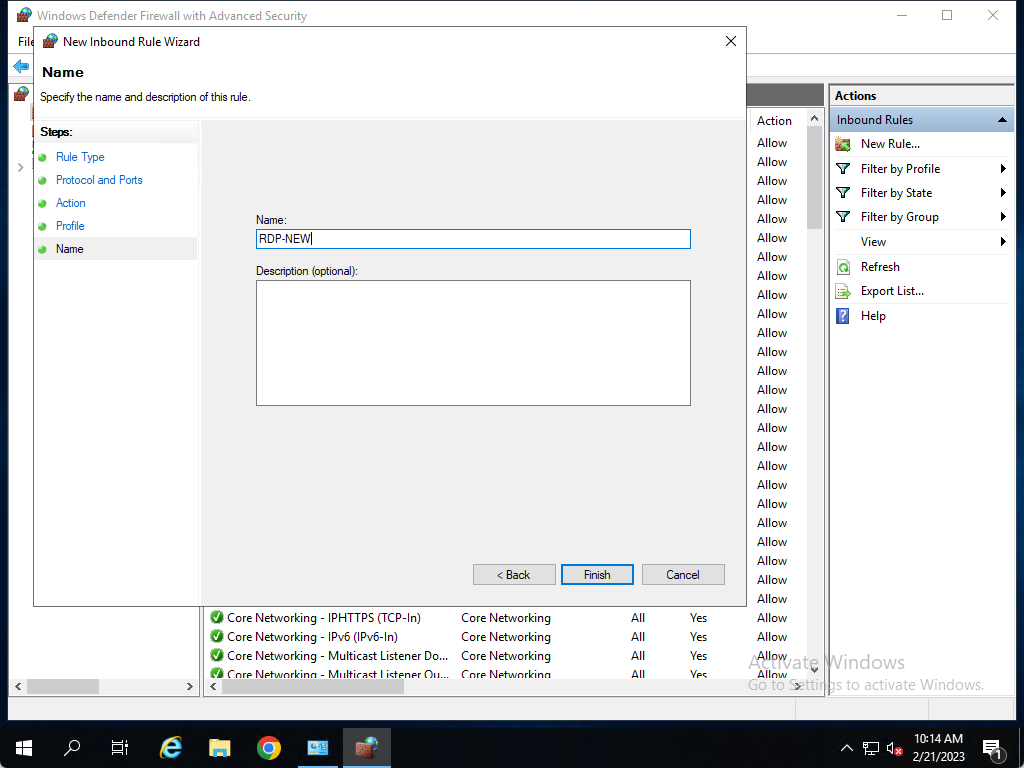
In the “Name” we indicate the name of the port on which we will open, and click on “Finish”.
How to restart the RDP service
We haven’t finished yet. In order server to work on the new port, we must restart the remote access service. Of course, we can also restart the server, but there is an option to restart this service, so all our software continues to work, without downtime.
Click on “Start” and look for “Services”. Click and open.
We are looking for “Remote Desktop Services” and we will restart it.
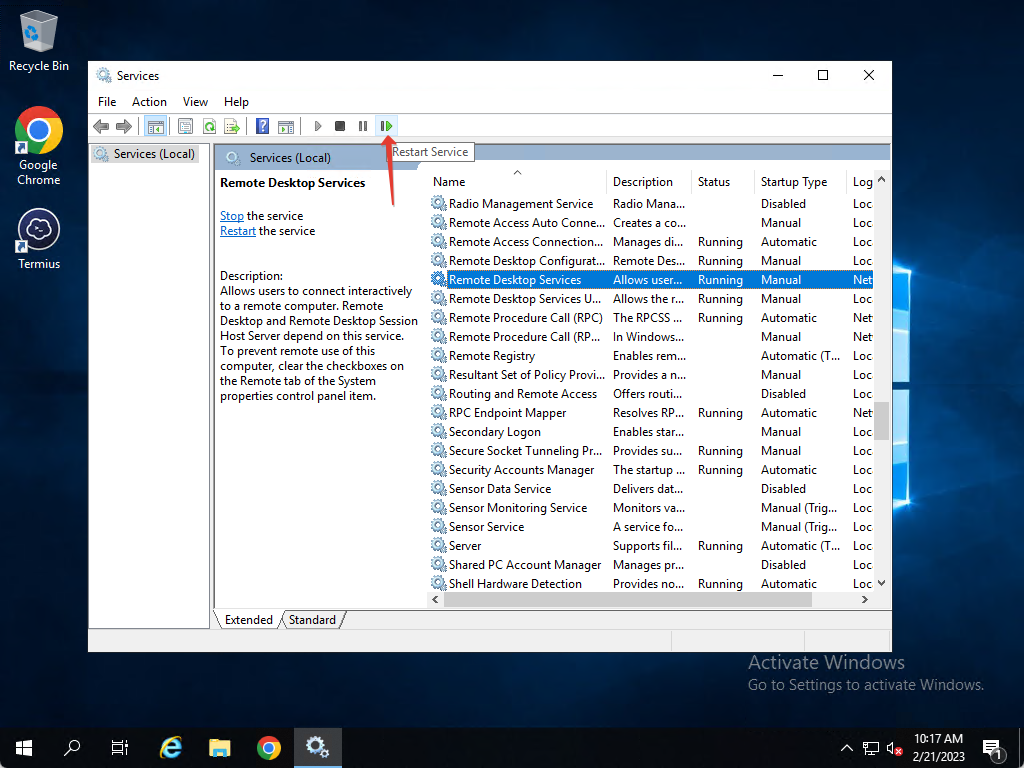
The service will see the new port and it will immediately close the connection to the old port for us.
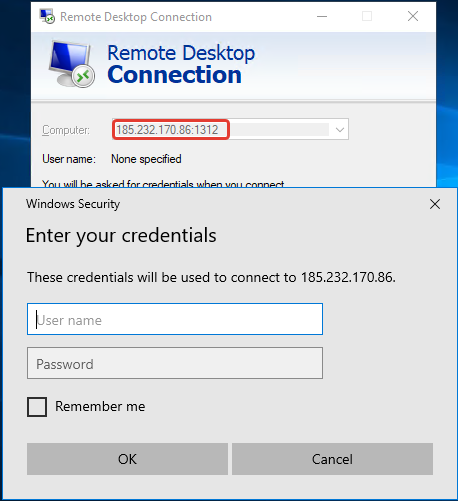
We reopen “Remote Desktop Connection” on our PC or other device and enter the IP and port that we opened and enter password for the Administrator user.
Now the server can be used without the fear that hacker will guess the passwords of users on your server, since they usually scan the standard port, and you changed it.