

How to add an additional IPv4 address
To add additional IPv4, we must modify the network adapter’s configuration file. We open it and immediately create it (on our hosting, ens3 is always the network interface, not eth0):
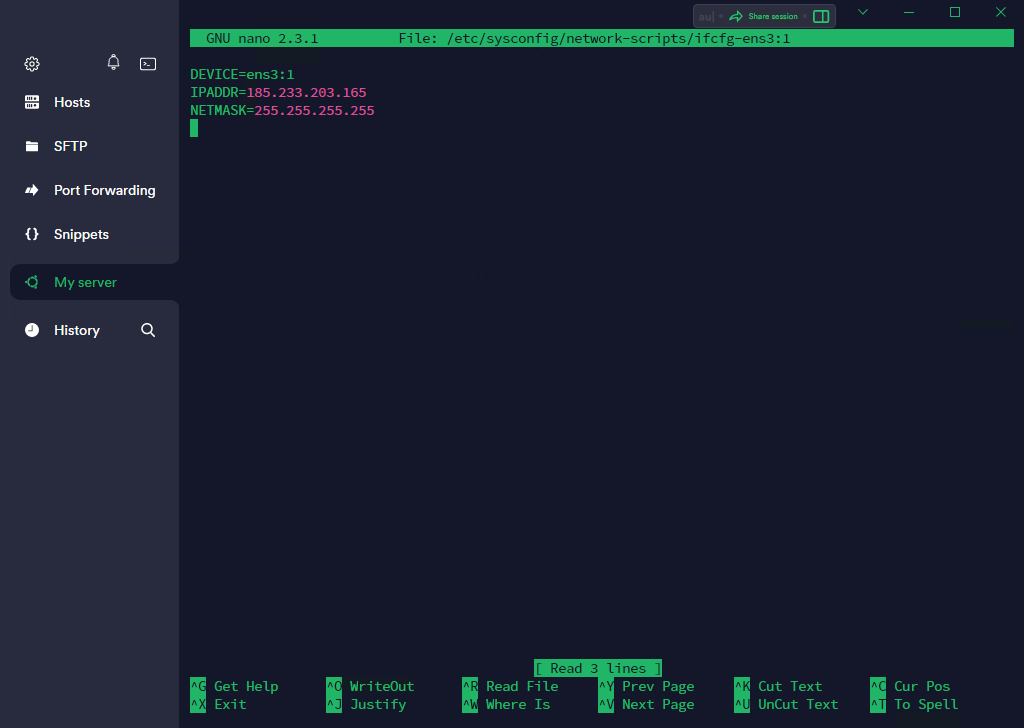
nano /etc/sysconfig/network-scripts/ifcfg-ens3:1
Once we’ve created and opened the config file, we’ll set the options to make our secondary IPv4 work:
DEVICE=ens3:1
IPADDR= Additional IPv4 IP address
NETMASK=Network mask
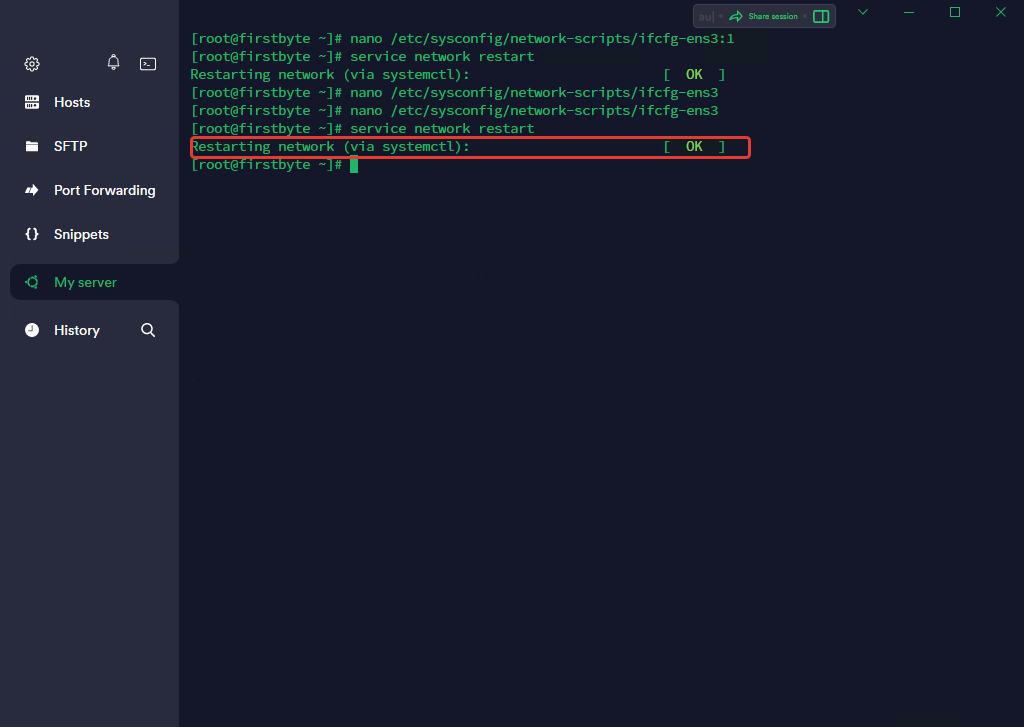
Click on “CTRL + X” and save our file. We then execute a command to restart the network on the server itself so that our IPv4 starts working:
service network restart

The network restart completed correctly. We can now open a command line and try to ping the additional IPv4
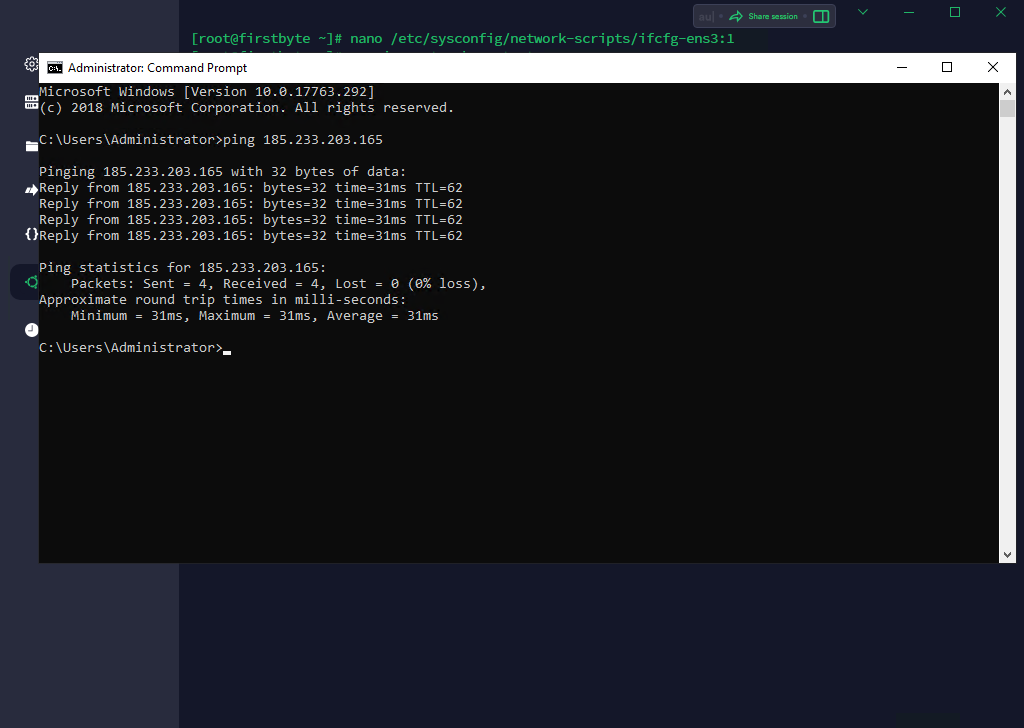
As you can see, we’ve added our IPv4 correctly and it’s working now.
How to add additional IPv6 address
The procedure for adding IPv6 is not the same as with IPv4.
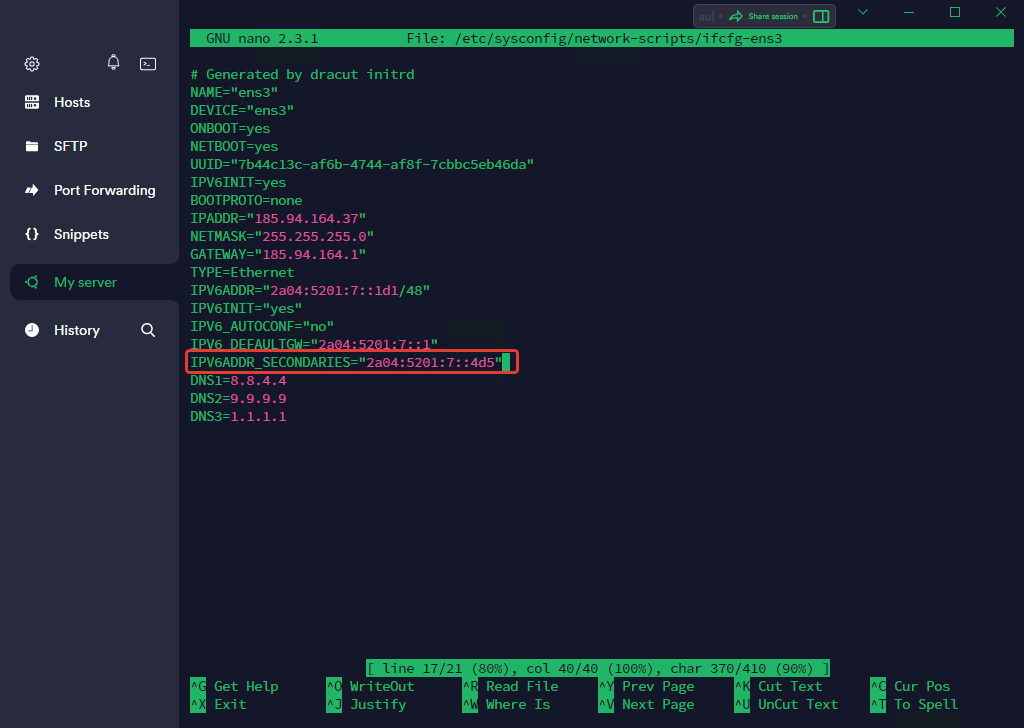
To add additional IPv6, open the network adapter configuration file and add only one line as in the screenshot, after the IPV6_DEFAULTGW line:
IPV6ADDR_SECONDARIES="Additional IPv6 address"
We save the configuration file, as we did above with the “CTRL + X“.
And then we execute the network restart command:
service network restart
Now we open a command line on our PC and try to ping the new address

As you can see, the additional address is pinging and available to all Internet users.