

What is Control Web Panel, or more precisely CWP
CWP is a popular free control panel designed to manage dedicated and VPS servers. It is an alternative to cPanel that provides many features for managing web hosting environments, including website management, database management, DNS settings, email accounts, user resource limits, and more.
Preparing server for panel installation
Setting up hostname
To set up a hostname, use the subdomain, NOT your domain, as the hostname. For example, if you have a domain called firstbyte.pro, your hostname should be the subdomain, such as panel.firstbyte.pro . Make sure that pinging the subdomain returns the IP address of the server. For example, if your server’s IP address is 127.0.0.1, pinging the subdomain of your hostname should return that IP address.
You can set the hostname using the command
hostnamectl set-hostname panel.example.comWe did this and now we get a response to hostname
[root@vm ~]# hostnamectl set-hostname tutorial.firstbyte.pro
[root@vm ~]# hostname
tutorial.firstbyte.pro
How we use AlmaLinux, we need to install Epel release and we do this using the command
dnf -y install epel-release

Installing the control panel
Now we are ready to install the control panel itself. Check the commands below carefully and run the ones that match your OS. You can confirm the OS version via SSH. Run the command below
cat /etc/os-release
The image above shows that we have AlmaLinux 9.3. We can now run the installation commands that are suitable for AlmaLinux 9.
Run the following commands one by one in your server terminal and wait for the process to complete.
cd /usr/local/src
wget http://centos-webpanel.com/cwp-el9-latest
sh cwp-el9-latest
After the control panel is installed, we must first save the data, or more precisely the MySQL root password
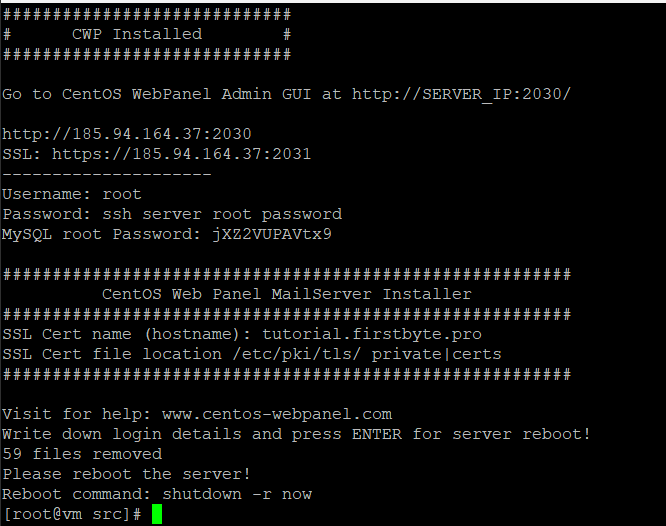
The data that was received
#############################
# CWP Installed #
#############################

Go to CentOS WebPanel Admin GUI at http://SERVER_IP:2030/

http://185.94.164.37:2030
SSL: https://185.94.164.37:2031
---------------------
Username: root
Password: ssh server root password
MySQL root Password: password
Then we have to reboot the server with the command
shutdown -r now
After the server has rebooted, we must enter the panel via the SSL link, as with the http link there is a redirection to the SSL link.
We need to accept the terms of the self-signed certificate, the panel page opens, we specify username root and its password and enter the panel.
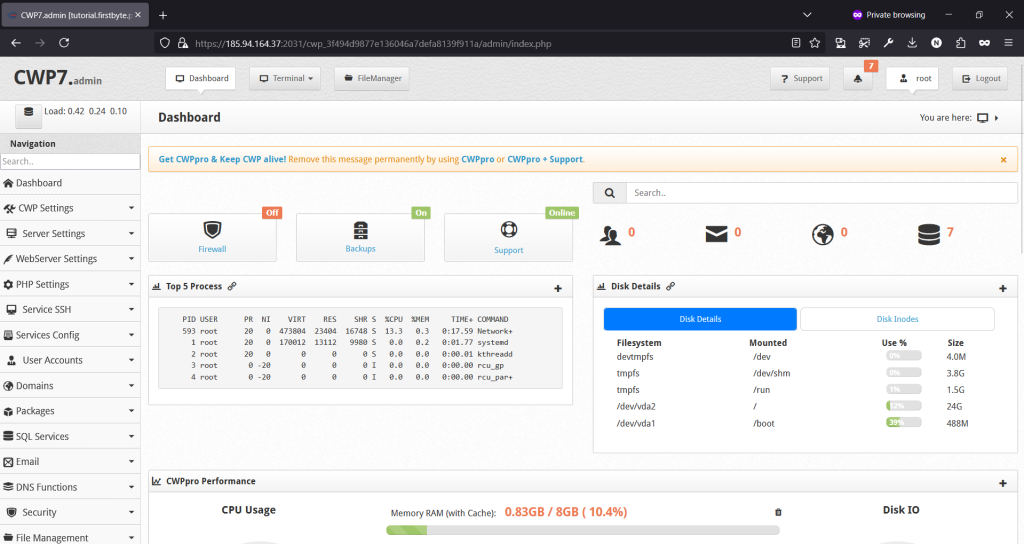
The panel looks exactly like this, in it you can now monitor the disk and check all other server load. Also, now that the installation is complete, you can start configuring the panel to suit your needs so that it is convenient for you to use.
It is important to know that the panel in the free license has a limit of 10 accounts, but the regular license itself, which adds more options, costs only $ 1.49 per month. You must agree that this is very little for the large number of options that you will receive.
As always, thank you for reading our guide to the end, if you have any questions, feel free to write to us and we will be happy to help you.